The Great War between the Kingdom of Poland and the Teutonic Order did not end with the great Grunwald Victoria, which took place on 15 July 1410. Although many of the Order’s knights – including Grand Master Ulrich on Jungingen – died or was taken captive, the Poles unfortunately failed to conquer Marienburg, which was the capital of the Order. The war stopped and this allowed the Teutonic Knights to rebuild their forces quickly. In October, their armies already numbered more than 10,000 people, mainly thanks to Western knights who believed in the Teutonic Knights’ propaganda and fought in large numbers against Poles and Lithuanians under Teutonian banners.
The Order sought to achieve peace for itself, which is why it was looking for the opportunity to fight another (this time the victorious) clash. One of the Teutonic armies that started offensive action was the 4,000 forces of the famous knight Michael Küchmeister from the New March, who after the conquest of Tuchola set off on the fortified Cistercian monastery in Koronów to attack Bydgoszcz from there.
The Grunwald Battle, 1410 Wojciech Kossak via Wikimedia Commons
When Polish troops received the news of Küchmester’s departure, King Władysław Jagiełło decided to try to destroy his forces, which were at that time one of the three operational Teutonic armies. However, the Polish ruler had a problem with gathering enough people – after the victory at Grunwald most of the army went home, and the Kingdom of Poland did not have enough money to keep the troops tight. However, Jagiełło managed to form a 2 thousand force composed of court knights, local units of the Poznań voivode and also light-armed Tatars. Polish forces under the command of experienced knights Sędziwój from Ostrorog and Piotr Niedźwiecki quickly took over the village of Koronowo and set up in a battle pattern behind the city, the front to the incoming Teutonic Knights.
When Küchmeister saw the coming Poles, he began withdrawing his troops. Eventually, he was caught up by them in the vicinity of Łącko village, where he took positions on the hill. On October 10, 1410, a battle began which took on the character of a tournament, i. e. the two armies set themselves in front of each other (front of the knights, behind their squires) and duels between knights began.
A break was ordered twice during the battle. During the rest, both sides exchanged prisoners of war with each other, shared food and wine, and even talked and sang about the heroic achievements of their opponents.
After the second break, in the third clash, Polish knight Jan Naszon from Ostrowiec defeated the Order’s bannerman. The Teutonic Order’s banner fell, which was a signal to retreat. Many of the fleeing Teutonic Knights and their allies were then captured by the Polish light-armed, who quickly chased and cought many opponents.
Even the course of the battle itself can be described as knightly and honorable, but what the Polish king later did was an even better example of observing the medieval knights ethos and, as we would call it in our times, a great Public Relations invention. After the battle of Koronowo, the Teutonic commander Michael Küchmeister was imprisoned in Chęciny Castle, but other prisoners of war, including many knights from Germany, France and Bohemia, allied with the Teutonic Knights, were invited by King Jagiello to Bydgoszcz. Recent enemies were treated with a royal feast, horses and the rest of the equipment was returned and then all knights were released.
Knights of the Teutonic Order Mariusz Kozik for Fireforge Games
All these knights went to the western courts, celebrating the courage, generosity and religiousness of the Polish king. It was a deliberate movement, a very effective defence against the Teutonic Knights’ propaganda which they used in Europe without any scruples in order to encourage the local knights to join the “crusade against Poland and Lithuania”.
The Battle of Koronowo brought several benefits to Poland – first of all, one of the three Teutonic armies was destroyed, weakening the offensive potential of the Order and bringing it closer to the peace treaty, which was concluded on February 1,1411 in Toruń. Secondly, Władysław Jagiełło’s cleverness and noble movement towards western knights allowed the European courts to slowly expose the true, expansive and false nature of the Order of Brothers of the German House of Saint Mary in Jerusalem.
[The banner was used here thanks to the permission of Mr Mariusz Kozik. More of his work is available here]
In order to attack the USSR, i.e. to execute Operation Barbarossa, the Germans threw four armoured groups of about 3,000 tanks against the Red Army. Initially the forces of the Third Reich quickly partook eastwards; already in September 1941 the German troops were close to Leningrad, and in November, the 2nd Panzer Army of General Guderian stood near Moscow. The Wehrmacht used its armoured fists perfectly, which, according to Blitzkrieg tactics, were quickly breaking the front and surrounding Soviet forces.
Example of armour strength of Soviet tank KV-1. Stalingrad, 1942 Bundesarchiv via Wikimedia Commons
The harsh winter and poor Russian roads stopped the Germans, through which the states of some Hitler’s armoured divisions were reduced by up to 50%. The Red Army managed to lead a victorious counter-attack near Moscow, thus saving its capital and opening a new chapter in the history of the Soviet armoured forces. Both sides of the conflict noticed then that even the best armed German tank of that period, i.e. PzKpfw IV had little chance against the new Soviet tanks T-34/76 and KV. In order to take advantage of this dominance, the Soviet high command (Stavka) started frantic rearmament of the remaining units with these tank models, and the Germans accelerated the development work of the new later dominators of battlefields, i.e. the heavy tank PzKpfw VI Tiger and the medium tank PzKpfw V Panther.
The first major operation, where the Soviet army took advantage of the mass impact of the armoured units, was the surrounding of the German forces during the counter-attack at Stalingrad in November 1942. The Wehrmacht was in reverse, but the brilliant maneuver of Field Marshal Erich von Manstein enabled the Germans to retake Kharkiv, inflict serious losses on the Red Army and set the front as in the summer of 1942. Adolf Hitler and his generals were preparing a major offensive to enable them to regain their strategic initiative at the Eastern Front, which the Wehrmacht lost at Stalingrad.
Operation “Zitadelle”
The preparation of a great plan of operation code-named “Zitadelle” (Citadel) began. This operation assumed the launch of an attack in the Kursk region, the destruction of the Red Army units deployed there and a subsequent attack towards Moscow. However, the weaknesses of the plan were discovered at the very beginning: General Walther Model alerted the command that the Russians had prepared a solid, well-organized defence on the area of the planned attack, thus suggesting a change of plans. General Guderian directly asked Hitler:
“Do you think that people know where the Kursk is at all? It is completely indifferent to the world whether we have Kursk or not!”
Despite these arguments, the Führer was stubborn. Knowing that German soldiers would enter the fortified and well defended terrain, Hitler saw his chances in new tanks, Panthers and Tigers, which were supposed to dominate over the Soviet T-34s and outweigh the scales of victory on the side of the Third Reich. He did not even worry about further warnings of Guderian, who knew that the Panthers were then undergoing the so-called “childhood diseases”, i.e. a big failure resulting from the fact that it was a new, untested machine at that time. While waiting for the delivery of new tanks, Hitler was willing to postpone the day of the beginning of the great offensive.
Tiger of 2nd SS Panzer Division “Das Reich” Bundesarchiv via Wikimedia Commons
Eventually, the date of commencement of the operation “Zitadelle” was set for July 5, 1943. The Germans were to attack Soviet positions from both sides. The group leading the attack from the north had at its disposal 747 tanks (including 31 Tigers) and 134 self-propelled guns (including 89 Ferdinands). The southern group was supported by 1303 tanks and 253 self-propelled guns. The operations on land were to be supported by two air fleets of about 1900 aircraft. The task of the Luftwaffe was to eliminate the Soviet aviation from the fight, and then to fight the Red Army’s armoured units.
The German command did not know that the Russians knew the exact content of the order recommending an attack on Kursk. In the Kursk region, units of the Central Front of General Konstantin Rokossovsky and the Voronezh Front of General Nikolai Vatutin waited for the Germans. Behind them, there were armies of the Steppe Front of General Ivan Konev. These forces had 3306 tanks and self-propelled guns.
Tiger from the 503 Heavy Tank Battalion near Kursk
The Red Army was dug in and prepared to repel the Wehrmacht’s attack, and then carry out a quick counter-attack. In the Kursk region the defenders dug 5000 kilometers of trenches and crossings, laid 4000 mines and stretched incredible amounts of barbed wire. Soviet positions even bent from anti-tank weapons, and the area in front of them was full of anti-tank mines. Wehrmacht tanks were supposed to drive straight into this zealously prepared trap, the success of which was supposed to change the fate of the entire Second World War.
Beginning of the fight
The Russians even knew where and when exactly the enemy would strike. On 5 July, the day the battle began, they were the first to pick up planes and try to attack German airports, where the Luftwaffe machines were ready to take off. The German air force managed to counteract, so an air battle took place, during which the Russians lost more than 430 planes and the Third Reich only 26 that day.
In the morning the German offensive near Kursk began, preceded by an intensive fire from the Red Army. Despite the initial losses, entanglements, trenches, barbed wire, mines and the number advantage of the enemy, the Wehrmacht broke through the Soviet defense in several places. Their disadvantage was the terrain, because the tanks got stuck in the mud, and their pulling out could last even many hours. Additionally, General Guderian’s warning was fulfilled – new medium tanks, Panthers, turned out to be extremely unreliable. An example can be two battalions: the 51st and 52nd, which in the morning of July 5th were equipped with 200 Panthers. On the evening only 40 of them remained in service! Luckily for Hitler’s armoured troops, they managed to repair another 100 overnight.
Another of Hitler’s armoured colossuses, i.e. Panzerkampfwagen VI Tiger, proved their worth in the fight. Tigers from a platoon led by the famous Lt. Michael Wittmann near Kursk, started their combat march by eliminating the Soviet anti-tank defense point and breaking the first line of defense. Then they fought a short skirmish with the T-34 platoon, which was forced by them to retreat. During the attack on the second line of Soviet defence, Wittmann was summoned to help another German tank platoon, which was surrounded by several T-34. The tank ace sent two Tigers to attack the Soviet fortifications, and he himself took the course on the trapped platoon. In a few minutes he destroyed three enemy T-34. On that day Wittmann himself destroyed eight T-34 and eight anti-tank guns.
Soviet anti-tank positions near Kursk Cassowary Colorizations via Flickr (https://www.flickr.com/photos/cassowaryprods/34834747431)
Inhibited offensive
On the second day of the attack the German armoured fist started to lose its impetus. There were sections where Wehrmacht tanks and infantry had minefields in front of them, dug T-34 and anti-tank positions that could not be overcome. Despite this, the attacks led by the Tigers still allowed the Germans to break through the Soviet defense in some places. The tactics of tank formation, which resembled the shape of a bell, turned out to be quite effective. Its core and front consisted of heavy Tigers, and the sides were covered with medium tanks. The superiority of the new German tanks over the Soviet units was sometimes crushing – Michael Wittmann himself, on July 7, again carried death to the Soviet armoured troops and independently destroyed seven T-34 and 19 anti-tank guns.
On July 7, the Germans used a new method of destroying Soviet tanks going to the front. A 57 mm cannon was attached to the Stuka (Junkers Ju 87) dive bomber, and with their help the Red Army’s armoured columns were attacked. The effect exceeded the expectations of the commanders – after many such actions on the battlefield there were a few dozen smoking Soviet vehicles left.
The slow attack of the Germans was slowly losing its strength and the resistance of the Red Army was consolidating. These few days of fighting cost them huge amounts of equipment and resources. The human losses were significant, but still smaller than the Russians. Field Marshal Erich von Manstein decided to bet everything on one card and hit the Red Army with II SS Panzer Corps on Prokhorovka in order to break through in the direction of Kursk. This operation coincided with the Soviet counter-attack – on the order of Stalin, General Vatutin commanded an attack on the German Army Group South.
A German soldier observes a destroyed T-34 tank, 40 km from Prokhorovka. Bundesarchiv via Wikimedia Commons
Tank Battle of Prokhorovka
It was around Prokhorovka that the biggest armored battle of World War II took place. Over a distance of 5 km, over a thousand tanks stood in front of each other, and their clashes were incredibly fierce. German vehicles tried to take advantage of their sniper advantage and keep enemy machines at a distance, but the Soviets were lucky and their tanks pushed forward and drove close to the Germans thanks to the dust that was hovering over the battlefield. Despite this, on July 12th for one destroyed German tank or cannon there were 4-5 lost Soviet armoured vehicles, although the Red Army had twice as much equipment advantage (300 tanks and guns against 600 – 800. Here you can find various data).
The ruthless fighting under Prokhorovka may be evidenced by the fact that the tanks lacking ammunition were battering each other.
Fighting as close as possible, the heavy Tigers could not maneuver as smoothly as the more agile T-34. Their powerful front and side armour was difficult to penetrate, but the Soviets tried to overlap and destroy them, avoiding the fire of the dreadful German 88 mm cannons.
Despite the high failure rate, the efficient Panther units proved to dominate the battlefield. Their accurate and powerful 75 mm cannon was able to break through any enemy tank present on the Kursk battlefield, and not a single hit on the front armour of any of the Panther turned out to be dangerous. As mentioned above, most of them failed due to numerous technical problems. On the German side in the battle took part also medium tanks – Panzer IV and a small number of Panzer III. The Soviets used mainly T-34, still in a weaker version with a 76 mm cannon, which did not give them a big chance in a normal battle against the Tigers and Panthers, but it managed well against Panzers IV.
It should not be forgotten that other vehicles and even animals showed up in the battle. On long distances the only worthy opponent for German armoured colossuses turned out to be the SU-152 self-propelled gun. The missiles fired from the 152 mm cannons had a terrible power – they were able to literally break German tanks in half. After the Battle of Kursk this destroyer was called “Zveroboy “, i.e. from the Russian “beast slayer”, bearing in mind how well it did against the new tanks of the Third Reich. The Germans also used a self-propelled Ferdinand cannon with an 88 mm cannon near Kursk. However, it had a small problem – the designers forgot to put machine guns in it, so it was easily destroyed by infantry.
Interestingly, one of the most effective weapons against the Wehrmacht and SS armoured units were… dogs with which the Russians attached explosives and sent them against German tanks.
Tomb of Corporal Heinz Kühl, a German fighting near Kursk Bundesarchiv via Wikimedia Commons
The fall of the Citadel
On July 15 the bleeding German Army Group Centre was struck by the Soviet Western and Bryansk fronts. The troops of the Army Group South withdrew to the starting positions before the operation “Zitadelle” and started defending their positions. This was the end of the German offensive near Kursk, and Adolf Hitler himself contributed to its failure, sending some forces to Sicily on July 13, where the Allied landing had just taken place. On the Russian steppes the Third Reich lost 416 000 soldiers, and the Russians – as many as 1 680 000 people. The German armoured forces, supplemented with great difficulty and precisely prepared for the great battle, were incapable of carrying out any offensive actions.
The Red Army Command decided to seize the opportunity to attack the weakened, exhausted opponent. On August 3, a great offensive started through Belgorod and Kharkiv, which within 21 days pushed the Wehrmacht to the west for 140 km. As history has shown, the Russians did not return the strategic initiative to Hitler on the Eastern Front, and Stalin’s hordes ended their march westwards only two years later, in Berlin.
It may not have been the war to end all wars, despite the atomic bombs dropped on Hiroshima and Nagasaki, but World War II certainly had a global impact. The only major attack on American soil took place on December 7, 1941 at Pearl Harbor (although there were a few other attempts), while the rest of the war played out in the European, African, and Pacific theaters. Still, the war had a dramatic effect on life in the U.S.
On the home front, rationing of food, clothing, gas, and other products began. Metal was needed to build machines of war, and scrap metal drives were common.
As you can imagine, this had a significant impact on the auto industry, as all available metal went toward the war effort rather than auto manufacturer assembly lines. What happened to U.S. automakers during WWII?
A Shift in Production
The Office of Production Management froze the sale and delivery of vehicles to U.S. consumers on January 1, 1942, shortly after the bombing at Pearl Harbor. On January 16, the War Production Board was established by President Franklin D. Roosevelt to regulate materials and fuels related to the war. Production of automobiles ceased February 22, 1942, at which time the stockpile of new automobiles numbered at 520,000, from which automakers would be allowed to make rationed sales to “essential drivers” during the war.
In April, the Automotive Council for War Production was formed by members of the auto industry, with the goal of sharing information and resources in preparation for the transition from producing consumer vehicles (cars and trucks) to making the trucks, Jeeps, tanks, airplanes, and other vehicles needed for the war, not to mention the implements of war like helmets, ammunition, and even bombs and torpedoes. Factories were upended to make room for new machinery and assembly lines. Almost overnight, automakers found themselves in the war business.
By early 1944, the stockpile of U.S. automobiles had dwindled to just 30,000, and in the fall of that year, certain companies, including Chrysler, Fisher Body (of General Motors), Ford, and Nash, received permission to allocate limited resources to work on new consumer car models, so long as their work didn’t interfere with the ongoing war effort.
What Did U.S. Automakers Produce During WWII?
During WWII, U.S. automakers manufactured a wide variety of vehicles, munitions, and more for the government. They made tanks like the Fisher Body Grand Blanc, the Ford M10 Wolverine, and the M18 Hellcat, produced by the Buick Motor Car Division of General Motors.
Automakers also produced parts for planes, including the infamous Enola Gay. The 18-foot nose section of the fuselage was built by Chrysler. Chevrolet alone produced 60,000 engines for Pratt & Whitney cargo and bomber planes between 1942 and 1945, along with 500,000 trucks, 8 million artillery shells, and much more.
By the time the Second World War ended in 1945, the total value of goods produced by the U.S. auto industry for the war would exceed $29 million (nearly $400,000,000 in today’s money). With the war over, automakers were free to return to manufacturing new cars for the consumer public.
The article is written by our partner, Camo Trading, internet provider of Camouflage home decor.
In 1805 Europe had been in war for 10 years. After the victorious campaigns on the continent, Emperor Napoleon turned his eyes to his next enemy, Great Britain. On the way to the invasion of the Isles, there was the English Channel and British Navy, whose task it was to stop and destroy the endangering Empire connected by a French-Spanish fleet. In October 1805, the United Kingdom closed the blockade of the enemy fleet, which took refuge in a Spanish port in Cadiz. The British knew that Napoleon was unbeatable on land – but it was they who dominated the seas, and they had to confirm it at all costs.
British Admiral Horatio Nelson Lemuel Francis Abbott via Wikimedia Commons
The person on whose shoulders this responsibility was incumbent was the most famous naval commander in the history of the British fleet, known for his indecent character, charisma and command skills – Admiral Horatio Nelson. Respected by his men, he was a great strategist, and a brave and experienced soldier – he took part in sea expeditions to India, the wars with France and Denmark against which he won three great victories: at Abukir, near Copenhagen and under Trafalgar. During his service he lost sight in the right eye and right arm.
At that time, sea battles had rather a fixed pattern: hostile fleets were aligned in line lines parallel to each other and started a cross-arming side fire. Such clashes could have lasted even a few days and sometimes ended without a clear decision. Neither Nelson nor British politicians were totally interested in such a solution. Everything had to be put on one card – the French fleet had to be destroyed, thereby averting the threat of invasion of Britain and confirming the uniquely reign of the Empire on the seas.
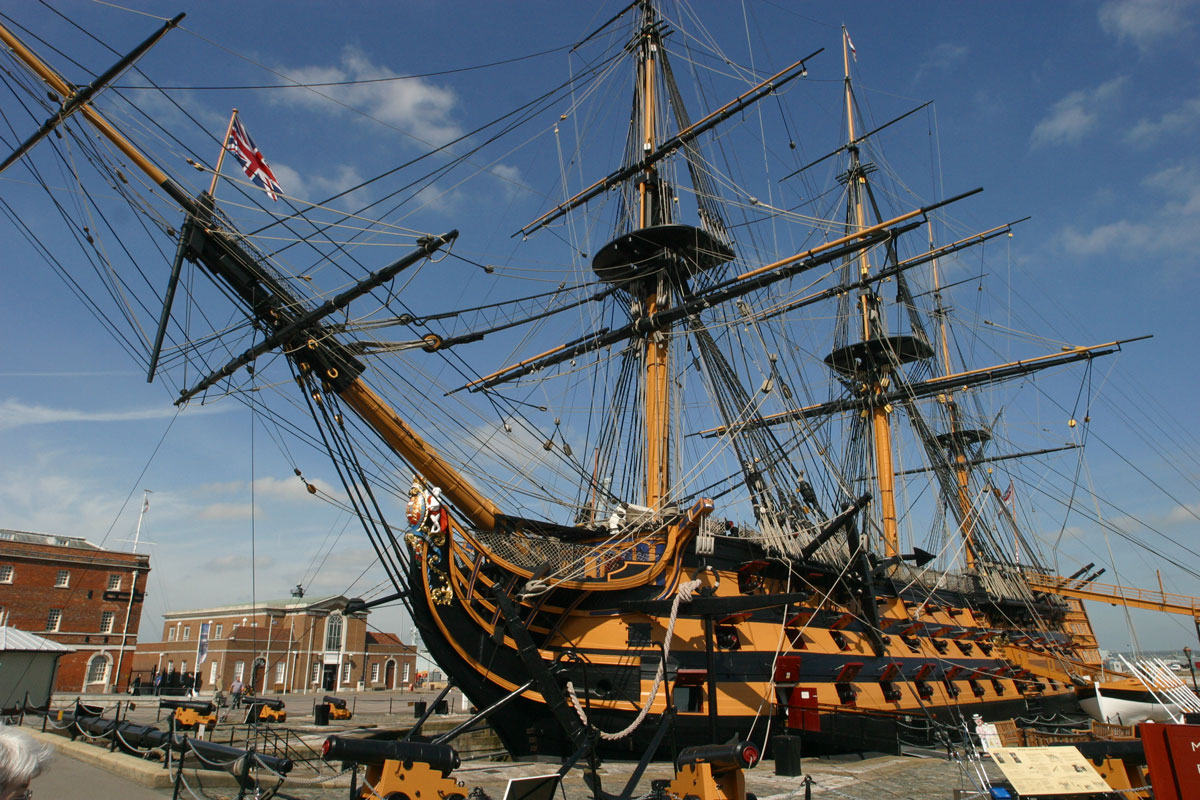
Nelson’s flagship ship from Trafalgar, HMS Victory. It is now used as a ship – a museum in Portsmouth. David Hewitt via Wikimedia Commons
Starting from this assumption, Nelson prepared an attack plan that was risky and gave hope for the elimination of Napoleon’s ships from subsequent warfare. The British Admiral intended to form two columns that were supposed to flow perpendicularly to the combined fleet and brutally wander into the middle of the enemy formation and destroy the them fighting at a close distance. The goal was to allow British artillerists to destroy the ship after the ship, taking advantage of the their of fire power and excellent training. However, this plan had a weak point – before reaching the French, the fleet of the Empire had to withstand almost an hour of shooting of enemy ships.
Nelson knew that the combined Spanish-French fleet had a numerical advantage over the British forces. The French Commander, Pierre-Charles Villeneuve, had 33 ships of the line and 5 frigates (including the heaviest ships on the world at the time, Spanish Santisima Trinidad with 130 guns and Príncipe de Asturias, Santa Ana with 122 guns each) , while Nelson had, respectively: 27 ships of the line, the heaviest of which each had 100 guns and the smaller ones with 67 guns, as well as 4 frigates. Apart from the difference in the number of ships, there were also large differences in their structure and properties, which had to be taken into account at that time.
French ships, which were found under Trafalgar, were characterized by great hydrodynamics and solid construction. Additionally, they were quite quick. The Spanish ships, built mainly as protection of convoys sailing to Europe from South America, were equally dangerous. They were a good combination of combat capability, strength and high speeds they could achieve.
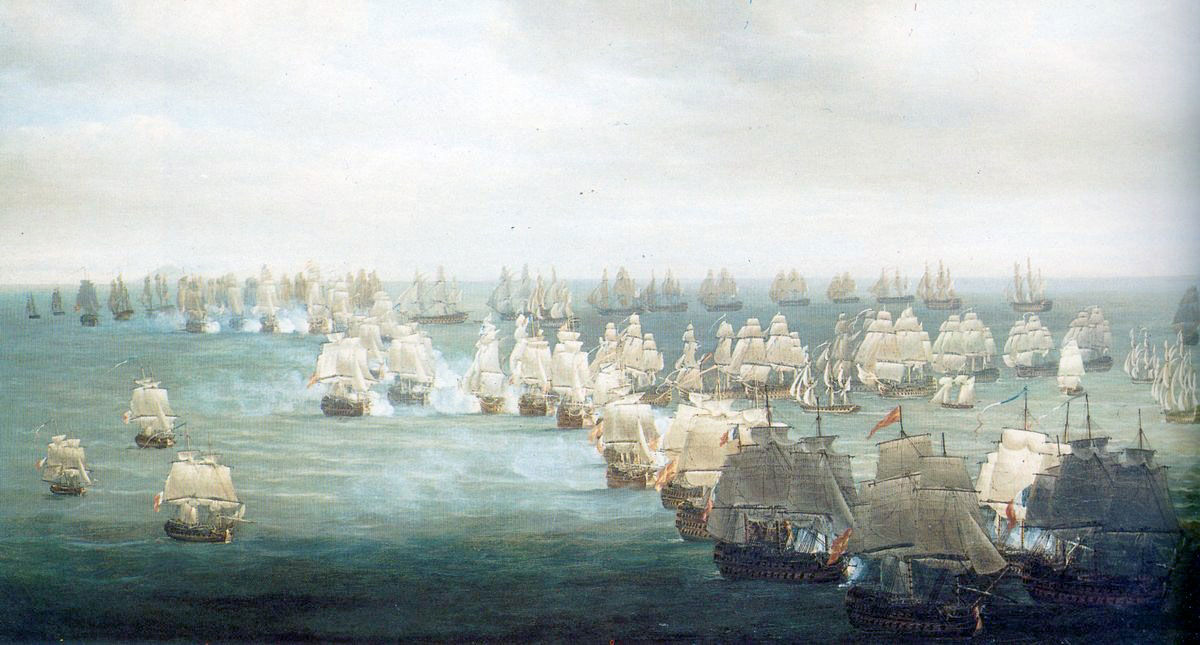
The beginning of the Battle. Two British columns are breaking the combined fleet’s formation. Nicholas Pocock via Wikimedia Commons
We should also mention a very important fact which could have decided on the outcome of the battle, which is the training of the crews. British sailors have had a lot of combat experience and a few months at sea. They could freely practice their combat, shooting, and manoeuvres in the open water. The French and Spanish, who were confined in Cadiz, did not have such an opportunity. They spent this time mainly on land, and their ships stood in the port – so there was no question of shooting from the guns. This lack of training, laziness was later to have a catastrophic effect on the later combat capacity of the combined fleet. In addition, the French fleet was only a shadow of its pre-French Revolutionary power, during which officers lost their lives or left the navy and ships were roaring in ports. The lack of training and experience was tragic for the French people during the battle that was about to come, and this is where the British Admiral saw his chances, who decided on such a bold and unconventional attack.
On 21st October Villeneuve brought his ships to the sea. Set in a line formation, Napoleon’s combined fleet occupied the whole horizon. Around noon, when the French and Spanish were at the level of Cape Trafalgar, their British forces were catching up, attacking them with two columns across Napoleon’s linear string. The first column was led personally by Nelson on the flagship Victory, and the second one by Count Cuthbert Collingwood on the Royal Sovereign. Because of the weak wind, the British people were shot for as long as an hour from the French cannons before reaching the enemy lines, unable to respond with fire.
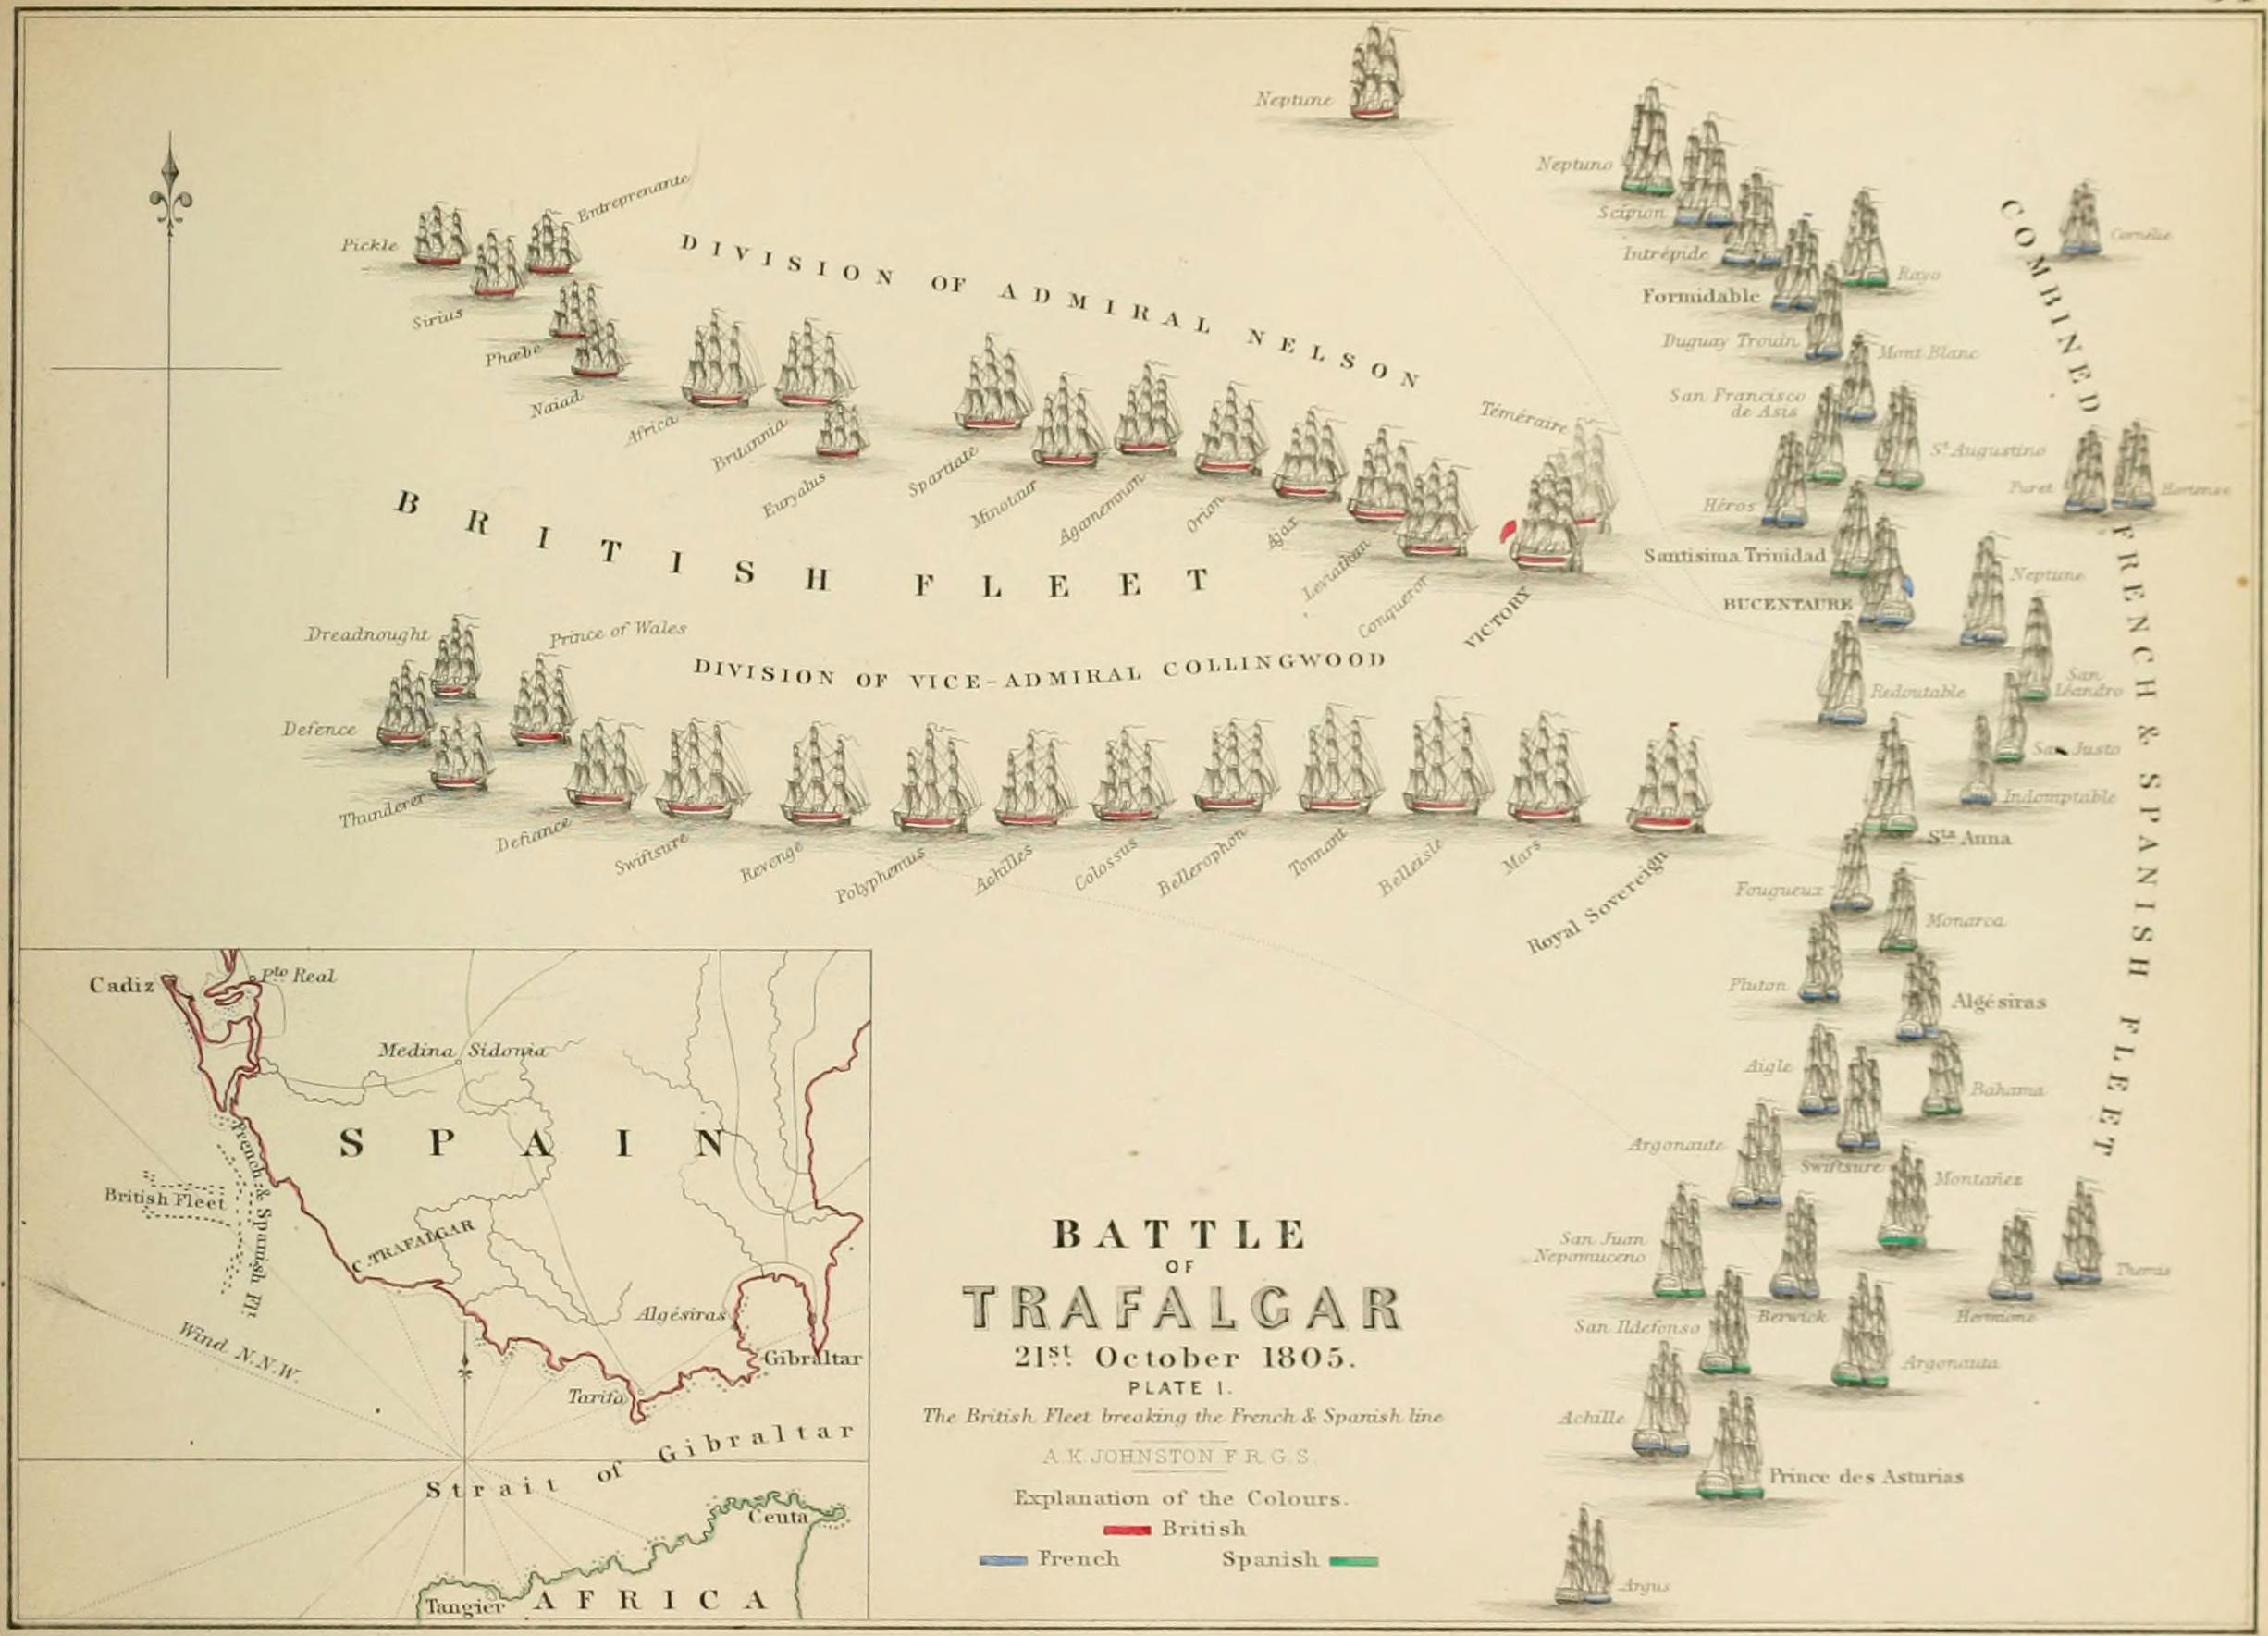
The Battle’s scheme Alexander Keith Johnston via Wikimedia Commons
About 12:45 Victory crossed the enemy’s lines beginning the battle at close distance in the form of duels between ships. Leading past the French flag vessel Bucentaure and the ship Redoutable, British flagship left a devastating side line on the Bucentaure, which killed or injured a large part of the ship’s crew. The British people who had a tactical and fire advantage were devastating amongst the rest of Villeneuve’s fleet and the battle of victories quickly started to bend on their side, but then Nelson himself was in a deadly danger. French 74-vessel Redoutable, the only ship of the French fleet that was able to fight and defeat the British flagship, came to Victory.
Captain of Redoutable, Jean Jacques Lucas, during his forced stay in Cadiz, predicted how the lack of training and training would affect the subsequent battle with the British. That’s why his crew in sweat of his forehead practiced what was standing up while mooring in the port, that is shooting, abordaining and close combat. They deadly surprised the crew of Victory under the Trafalgar, first by firearms killing the majority of people on the upper deck and then carrying out further abordaining attempts.
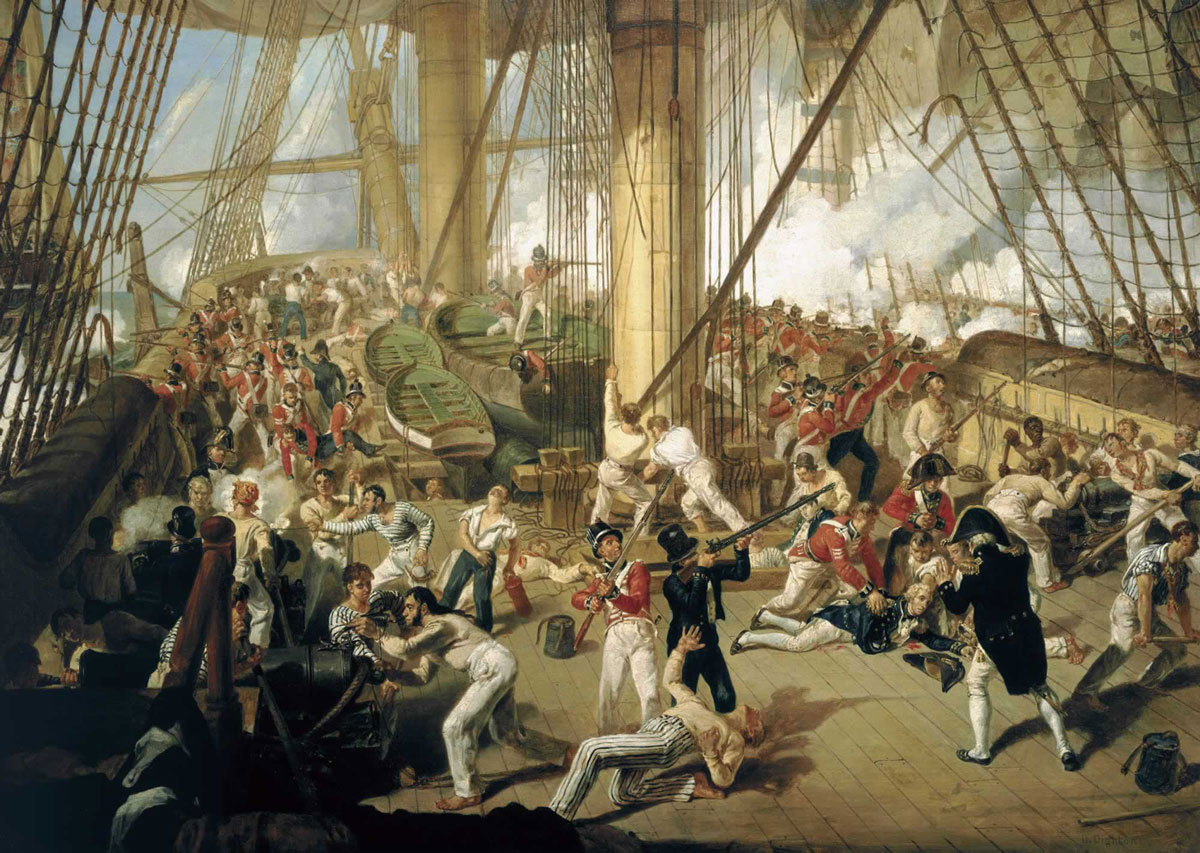
Nelson never thought to hide from the crutches, and all the time he walked peacefully on board, contemptuously contempting the danger and wanting to motivate his soldiers to fight. Dressed differently from the rest, he was a great target for the French shooters. After 13:00 a. m. one of them managed to shoot and hit Nelson in the spine. The deadly wounded commander ordered immediately to lift him under the deck, not wanting that the sight of his own dying ship would have a negative impact on the morale of seamen.
The moment Nelson was shot by a French shooter. Denis Dighton
The battle was still going on; soon afterwards, a British ship Temeraire came from the other side of Redoutable and with a few murderous salvos forced the French crew to give up. Just a short while earlier captain Lucas had only 99 out of 643 people and he was not thinking of stopping the attacks on Victory.
The rest of the French fleet was overwhelmed. Great Britain did not lose a single ship, while France and Spain lost as much as 21 seized ships (plus one damaged), more than 3,200 deaths, almost 2,500 injured and 4,000 captured people.
Admiral Horatio Nelson died at 4:30 p. m., being aware of the great victory he managed to achieve. His bold and risky plan allowed the French fleet to be destroyed, but it cost the lives of one of the best naval commanders that history has seen. The last words of admiral were “God and my country”. He was heard earlier in the sentence “Thank God I have done my duty”.
HMS Sandwich and HMS Temeraire fighting Bucentaure Auguste Mayer
French Vice Admiral Pierre Charles Silvestre de Villeneuve was taken prisoner and after several months in custody in the British Isles was allowed to return to France. On April 22,1806, he was found dead in his house in Rennes, having several puncture wounds in his breast. The French police found suicide, but it is possible that he was murdered by Napoleon’s order, who could not forgive the vice admiral command under Trafalgar. At the time of his death, Villeneuve was the last living of the three remaining commanders of Trafalgar (Spanish Admiral Federico Carlos Gravina and Nápoli died on 9th March because of wounds received in the battle).
The trafalgarian victory not only gave up the spectre of a possible invasion of Napoleon’s troops on the British Isles, but above all, it strengthened the maritime hegemony of British fleets and enabled them to thrive in the colonial empire.
In 1809, Finland lost its independence to the Russian Empire and existed on maps as the Grand Duchy of Finland, a state subject to the tsars. It regained its freedom only in 1917, taking advantage of the Russian Civil War, and remained a neutral country until the outbreak of World War II, while maintaining close diplomatic and military relations with Germany. Throughout this time, there was a threat of invasion from the Soviet Union hanging over the Finns, who had seceded from the USSR and were considered a province by the Soviet government. The Soviet Union also wanted to eliminate the potential threat of a German attack through Finnish territory in case of war. The Soviets made increasingly bold demands (mostly territorial) that proud Finns did not accept.
Red Army soldiers in Finland. There is a visible lack of their winter uniforms Source: N. Petrov and V. Temin, via Wikimedia Commons
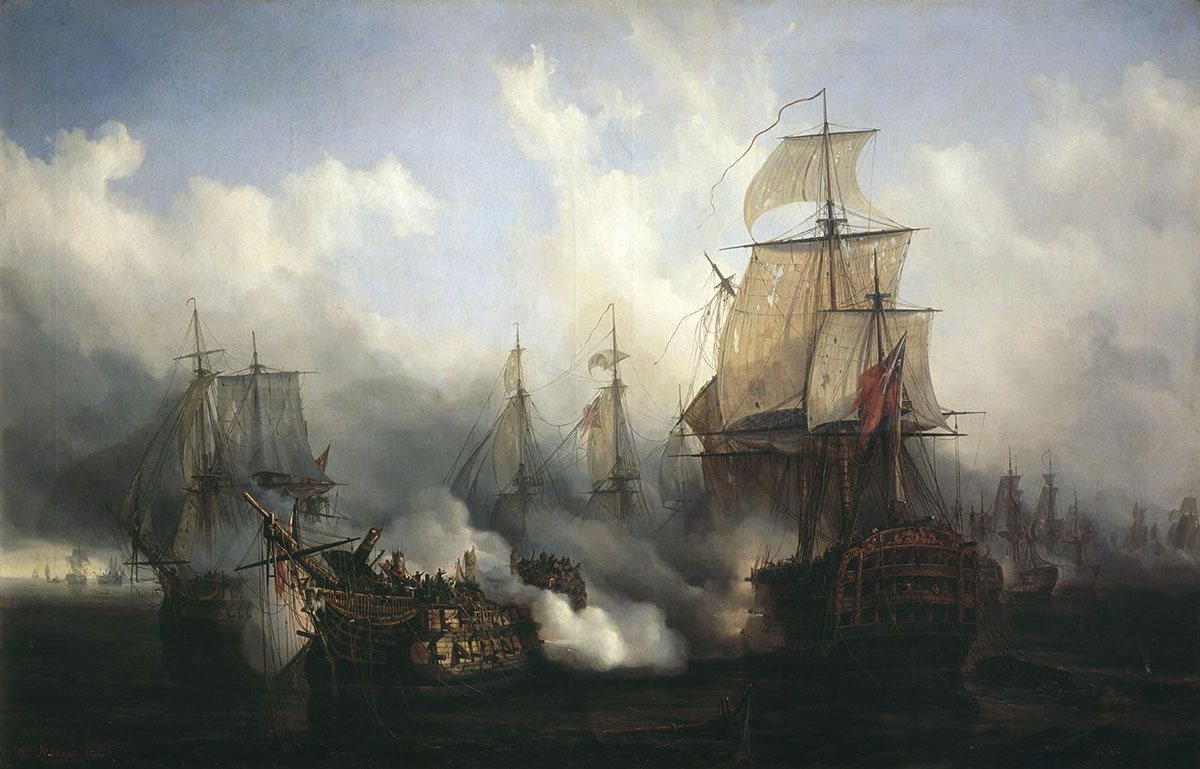
On November 26th, 1939, after the attack and capture of, among others, Poland, the Soviet Union staged a provocation in the small village of Mainila near the border with Finland. The Red Army shelled its own territory and then blamed the Finnish artillery, giving the Soviets a pretext to attack their smaller neighbor. On November 30th, the Soviet Union launched an attack on Finnish territory, with a force of 450,000 soldiers quickly reaching the defensive fortifications on the Karelian Isthmus called the Mannerheim Line. 80,000 Finns defended themselves bravely and skillfully, using camouflage, knowledge of the terrain, discipline, and expert artillery fire. Finnish commanders were not intimidated by Stalin’s forces, as evidenced by the words of Marshal Carl Gustaf Mannerheim, who said, “There are so many of them, and our country is so small, where will we bury them all?” However, they still faced almost half a million enemies, supported by airpower and tanks.
The Soviets did not know that the village of Rautjärvi, the hometown of Simo Häyhä, a local farmer and hunter in the rank of reserve corporal, was located near the front. Häyhä, who was an excellent marksman, immediately headed to the Mannerheim Line and was included in a small team of skiers tasked with hunting down Russians using speed and camouflage. The invaders were usually an easy target for Finnish marksmen, as they did not even have winter clothing (white uniforms) and their tanks were painted in dark colors.
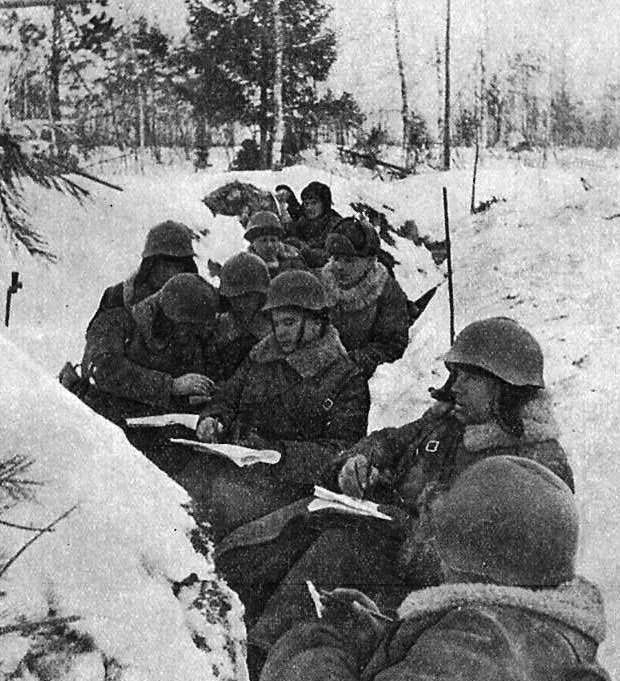
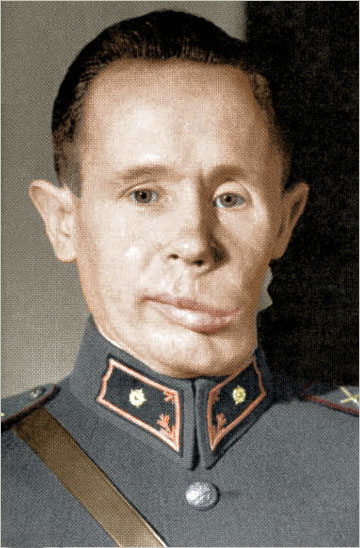
Simo Häyhä after receiving his M28 rifle Finnish Military Archives via Wikimedia Commons
Simo Häyhä went to the forest alone every day to hunt Red Army soldiers. Equipped with a snowy camouflage, armed with a Mosin sniper rifle and a Suomi KP submachine gun designed for close combat, he particularly looked out for Soviet commanders, political officers, sappers, and artillerymen whom he tried to eliminate first. He was quickly christened “White Death” because he was invisible to the invaders and deadly effective. The Russians were terrified of him and told each other stories about his abilities.
First and foremost, Häyhä was invisible to the enemy. Dressed entirely in a white snowsuit, with a white mask covering his face, he blended perfectly into his surroundings. To conceal his breath vapor, he held snow chunks in his mouth, and to avoid raising dust after firing, he poured water on the snowdrifts. He was capable of remaining motionless for hours, buried in snowdrifts in temperatures as low as -40°C, waiting for an opportunity to shoot. During this entire time, he mainly used a simple M/28-30 rifle (a modified version of an old Russian Mosin) without an optical sight – nevertheless, he was able to kill a man from a distance of up to 500 meters. He claimed that using a sight would require him to raise his head higher each time, which would expose him to detection by enemy shooters. Interestingly, Simo tried not to aim for the heads of his enemies. He believed that the chest was a larger and therefore more reliable target, and therefore he aimed for that point on the body before pulling the trigger.
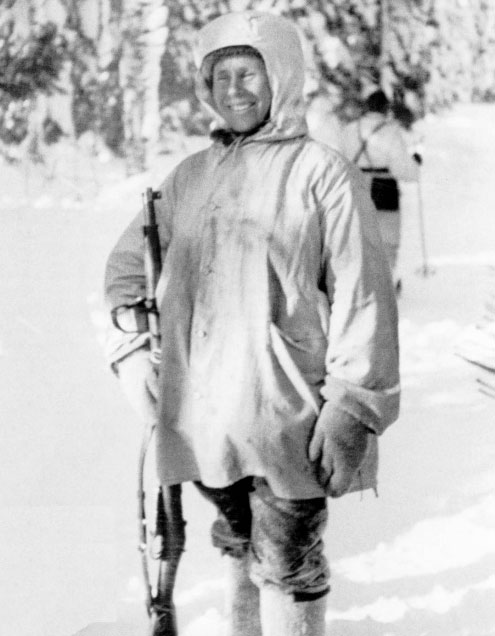
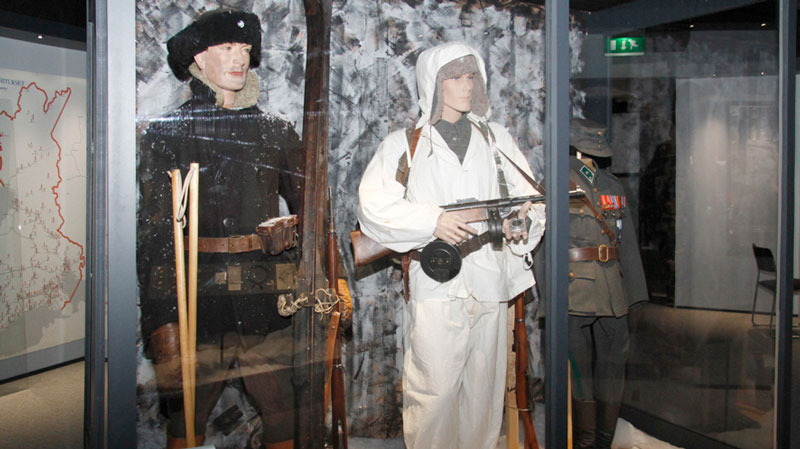
Simö Häyhä’s uniform during the Winter War Source: SotamuseoSuomenlinna via Wikimedia Commons
Armed with a simple (but reliable) weapon and with an excellent knowledge of the terrain and his abilities, Simo Häyhä systematically and mercilessly dealt death to the enemies of Finland for over three months, killing an average of 5 Red Army soldiers per day, like a grim reaper.
Armia Czerwona starała się wyeliminować Fina, który bezkarnie dziesiątkował jej szeregi. Wysłany w celu zabicia Simo snajper został przez niego zastrzelony, gdy promienie słoneczne odbiły się od jego celownika optycznego zdradzając jego pozycję. Przez następne dni wojny najeźdźcy za pomocą artylerii bombardowali każde miejsce, gdzie tylko podejrzewano obecność Fina, licząc na to że genialny snajper zginie podczas brutalnego ostrzału – ten jednak zawsze potrafił ujść z życiem, tylko raz tracąc swój płaszcz przez zdetonowany w pobliżu szrapnel i innym razem odnosząc lekkie rany podczas ostrzału artyleryjskiego.
The Red Army tried to eliminate the Finn who was ruthlessly decimating their ranks. A sniper was sent to kill Simo, but he was shot by him when the sunlight reflected off his optical sight, revealing his position. In the following days of the war, the invaders bombarded every place suspected of harboring the Finn with artillery, hoping that the brilliant sniper would perish in the brutal barrage. However, he always managed to escape with his life, only losing his cloak once due to shrapnel detonation nearby, and sustaining minor injuries during artillery fire another time.
Simo’s last day of hunting for Red Army soldiers was on March 6, 1940, when he participated as an ordinary infantryman in covering the retreat of the Finnish infantry withdrawing from a Soviet counterattack. He killed his 505th enemy – a Russian soldier who had shot half of his face off moments earlier using a prohibited exploding bullet, the explosion of which deprived Simo of half of his jaw. The bloody and barely alive sniper was quickly evacuated from the front, and when he regained consciousness after an 11-day coma, the Winter War had already ended. His recovery took several months and required 26 surgeries.
Simö after the war, 1940 Joachim Idland via Wikimedia Commons
It is stated that using his Mosin sniper rifle, he killed 259 Russians, and the same number using a regular Lahti pistol and a Suomi KP submachine gun – by the way, the later Soviet PPSh was a copy of this excellent Finnish rifle. Killing over 500 enemies took Simo about 100 days, which today seems absolutely incredible, especially since the famous Finn acted completely alone, having nothing but a simple weapon without modern sights.
During the Winter War, the Finns lost 23,000 people, while the USSR lost over 200,000 (the exact number is unknown), plus over 2,000 tanks and armored vehicles and almost 1,000 aircraft. As a result of the peace treaty, Finland lost 35,000 km² of its territory. The small and insignificant piece of land that the Soviet Union gained came at such a great cost that one of the Soviet generals commented on it with the words, “We have gained just enough land to bury the dead.”
Simo Häyhä passed away in 2002 near his hometown of Rautjärvi, the same place from where he set out 63 years earlier to defend his homeland against Stalin’s troops. After the war, he was promoted to the rank of second lieutenant and decorated with numerous medals. He devoted his time to hunting and dog breeding and never married. After the war, he was reluctant to talk about his experiences during the years 1939-1940, but towards the end of his life, he began to share his story more willingly. When asked to comment on his terrible record set during the Winter War in 1998, Simo modestly, as befits a hero, replied:
The first traces of human settlements in the northern part of the British Isles are estimated to be around 5000 BC. 400 years after the birth of Christ, the Celts began to arrive on the islands and it was their customs and beliefs that shaped the cultural identity of the later Scots. The Celtic sense of tribal affiliation had a direct impact on the formation of Scottish families whose representatives for centuries did not submit to the central government, because they felt loyalty mainly towards their families and their interests.
The beginnings of the unification of the Celtic tribes of Scottish and Pictas (as their Romans called them) took place with the development of Christianity. The first Christian ruler of the northern part of the Islands is Kenneth MacAlpine, who founded the kingdom of Alba in 843. Its inhabitants have long resisted the invasions of the Anglo-Saxons, maintaining a distinct culture of the kingdom, but accepting from their neighbors some political changes – such as administrative division (county system) and justice system.
Over the course of time, in the grace of Edinburgh, mighty people from the French provinces of Northern France came into contact with each other, who, in return for the Scottish lands, gave the new king the driving units at their disposal. However, they often had double loyalty. Scotland began to be clearly divided into two regions – the southern, diverse Lowlands nationalities and the northern Highlands, where tribal division dominated.
Scotland’s troubles began with the tragedy of the Canmore family ruling there. A series of misfortunes began with the death of 35-year-old Margaret, wife of Scottish King Alexander III. Six years later their younger son died, two years later their older son and daughter. Alexander III himself died shortly afterwards, breaking his neck when he fell from a horse. The last living person from their family was the king’s granddaughter, young Margaret, who was staying at the court of the king of Norway at that time. However, she got a fever when she returned to her country and also died. Due to the lack of a legitimate ruler, the Scottish people became aware of the spectre of the Throne War.
Loss of independence
Efforts for the crown were initiated by representatives of several Scottish noble families. In order to avoid fighting between them, the King of England Edward I Plantagenet, known as Edward Longshanks, was asked to mediate. Instead of taking an arbitrage, he himself demanded homage from the Scottish nobility. Many mighty people (especially those who had lands in England or France) did not want to expose themselves to his anger and did not resist him. Edward I appointed John Balliol as the King of Scotland, his man-marionette, and he quickly promised obedience to England. Scotland thus found itself at the mercy of its southern neighbour in this tragic way.
When England began the war with France in 1294, the Scots took the opportunity to end their obedience to Edward and covenant with France. The English king quickly gathered the army and set off north to force his will on Scottish lords. They started the war with the collapse of border towns and villages, but they failed to conquer the castles in Wark and Carlisle. Meanwhile, the army of Edward I passed the Tweed River and besieged, and then bloodyly conquered the port town of Berwick . The English started marching northwards.
In April 1296 the English army besieged Dunbar Castle in Scotland. The army under the command of John Comyn, brother of the owner of the castle, was hurried by the crew with help. The English, under the command of the experienced John de Warenne, Count Surrey, came out opposite them and the two armies met on Lammermoor Hills. De Warenne, seeing the number advantage and better position of Scots, resorted to the fortel pretending to be the opposite of his own troops. Comyn’s army fell into a trap and started to chase the English, but they instantly changed the front and accepted the attack in the penal chic, stopping the impact of inert Scottish masses and allowing cavalry to complete the work of destruction. The Scottish defeat was total – many people died and a large part of their nobility was captured. Edward I knew the other mighty mighty who were in conflict with each other were not able to form any defence of the country, and he crowned himself without delay as the King of Scotland. He took the humiliation of his recent opponent as a point of honour; Scottish crown jewels were taken to London, de Warenne was appointed manager of the whole country, and Plantagenet’s return to England on the Tweed River was said to say,’ he is doing man well if he gets rid of his mockery!”.
Scotland was conquered and its people entered the English occupation. The invaders’ troops reigned over villages and towns, taxes were increased, forced recruitment of recruits to Edward’s army was permanent, and wool harvests were reclaimed. All of this caused Scottish troubles, but there was a lack of leaders among them – a large part of the nobility was closed in English dungeons, and those who were at large were afraid of opposing the English king.
Wallace leads the Scots to fight
In this difficult situation, Scotland has heard of the deeds of a poor nobleman named William Wallace. Its past is not fully known, although it is certain that it was well educated. The beginning of his fight against the invader began with an armed speech against the English garrison in Lanark. One day a few soldiers wanted to take a fish away from William, and this one, defending himself, killed one of them and injured a few. Englishmen immediately sentenced the proud nobleman to death, but he returned on the second day with his 30 companions, with the help of whom he gained an English guard and executed the death sentence as garrison commander. Wallace began partisan activities, during which he attacked English strongholds in the Forth and Tay rivers. Hunting was carried out on the English people, and especially efforts were made to catch royal officials.
Crowds of volunteers started to come to Wallace’s troops, those who wanted to throw away a yoke of captivity and return Scotland’s independence. The country was united under the orders of one leader, William Wallace.
At the beginning of 1297, the Uprising covered almost all of Scotland. By the end of the summer, the Scots had recovered most of the castles in the north of the country, and in September Wallace joined forces with the highlanders led by Andrew de Murray. Both leaders started a regular war against England.
The slaughter of Stirling
In the news of the Scottish revolt, King Edward ordered to gather forces from the northern provinces of England and to combine them with the occupational corps of de Warenne. In total, this army counted around approx. 350 heavy-armed knights, 10,000 infantry and 800 elite Welsh archers. Most of them were veterans led by experienced officers who knew the war crafts and were hardened in battle. Unfortunately, this could not be said about the Scots – the forces led by Wallace consisted mainly of volunteers – 180 light cavalry and infantry. Most of them were equipped with spears or axes and only a few had armor such as the earrings. In addition, the insurgent army did not have the support of the nobility, which mostly hid in the castles and waited for the result of the upcoming battle.
The English Army underwent a course in Stirling, the city of Central Scotland, an ideal location for future warfare. Wallace wanted to replace de Warenn’s path, and he succeeded on September 10 when both sides stood opposite each other separated by the Forth River. Scots took a position in the forests around Abbey Craig’s hill, from where they watched the enemy.
Commander of the invaders, Count de Warenne, was sure that he would quickly wrestle with the rebels. First, he sent two Dominicans to the Scottish camp, who were supposed to persuade Wallace and the company to give their homage to Edward I (They refused, of course). He also ignored the advisers’ requests to cross the ford instead of the bridge. An experienced commander completely ignored the serious danger of crossing a very narrow bridge under the opponent’s nose.
William Wallace and the rest of Scottish commanders knew how to take advantage of this opportunity. They intended to pass through the river a certain part of the English, and then attack and crush both parts of the army. The plan was supposed to be difficult – it was not possible to carry out the attack too quickly, because a large part of the de Warenne’s army would remain untouched on the other side of the shore. On the other hand, the late attack did not carry the threat of clashes with too many opponents.
In the morning of September 11, the English got a signal to start the crossing on the other bank of Forth. The tip of the barn, followed by the front guard led by the hated royal treasurer, Cressingham. When about half of the invaders crossed the river, Wallace started a storm. At first, the Scottish benches were slowly moving towards the English people, on whose side the Welsh archers released the rain of arrows. In spite of the many dead and wounded, they went further, falling with great impetus and fury on the hostile lines. At the same time Murray together with his people broke through the bridge and cut off the possibility of further crossing of the river for the defenders.
There was chaos among the English people. Many of them, instead of fighting, tried to save themselves by jumping into the water, but they died under the weight of their armour. Cressingham’s isolated units were methodically broken down and cut into a trunk by the brave Scots. The English commanding officer himself was brutally cut into pieces. The situation of the encircling soldiers of de Warenne was not even rescued by the last, desperate charge of English knights who tried to break through the bridge in the direction of the front guard. The cavalry became encircled with spears, and the knight leading the attack, named Marmaduke de Thweng, was one of the few who went out with life, holding in his hands the body of a fallen nephew.
Only a small group of enemies escaped from the Scottish hands with life. The English lost between 2.5 and 5 thousand people. Wallace’s army suffered minor losses (probably hundreds of dead), but the biggest loss was Murray’s subsequent death from wounds in the battle.
Wallace chased the remains of the army of de Warenne to the southern borders. In the news of a defeat at Stirling, most of the English garrison of occupied fortifications left their posts themselves. Taking advantage of the temporary weakness of his enemy, Wallace led Scots to the south and fooled northern England, reaching as far as Newcastle.
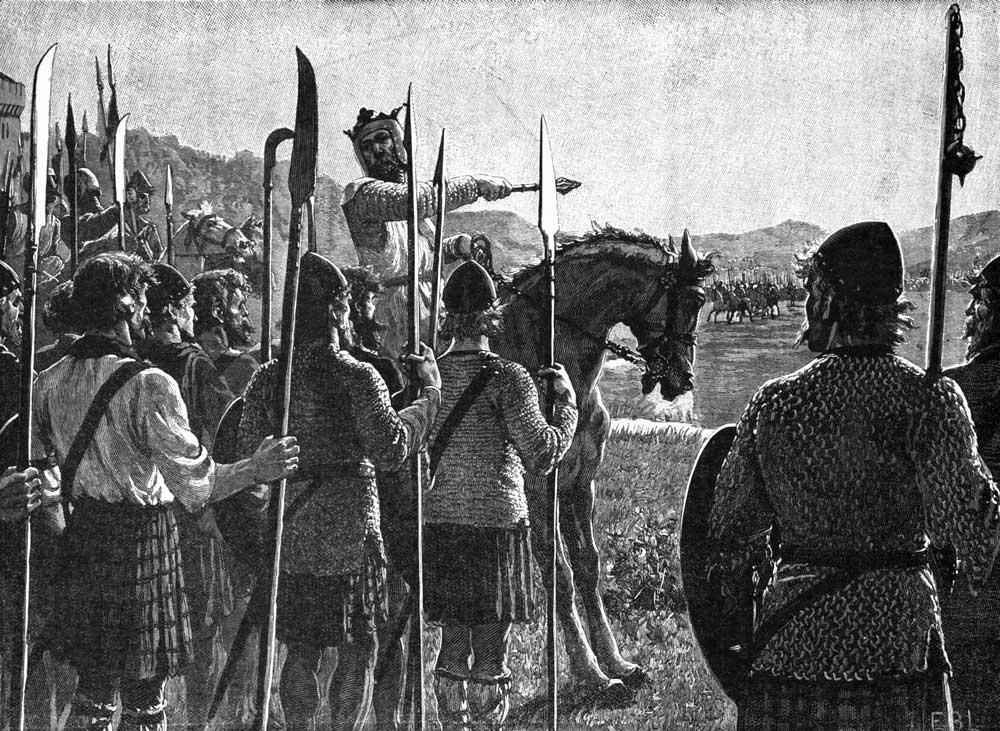
King Robert Bruce before the Battle of Bannockburn Edmund Blair Leighton
William Wallace’s further struggle and death
The victorious William Wallace was declared the chief commanding officer of the Scottish army and guardian of Scotland. This cunning warrior realized that he had won the battle, but not the war. He began his efforts to support the Scottish independence issue at European courts. He wrote lots of letters to commercial guilds and tried to hire the German infantry. In the meantime, Edward I Plantagenet gathered the largest army in England’s history (over 20,000 people) and set off on Edinburgh.
Wallace chose a clever strategy to stop the invaders, aimed at fighting the guerrilla: systematic jerks of Edward’s army, destruction of food supplies and the dragging of English soldiers into ambush. When everything started to look good, a part of Scottish nobility again betrayed their country and revealed to Edward the place where their own army stood. On July 22,1298, the Falkirk Battle was fought, which ended with defeat of Scottish patriots.
The “Brave Heart” did not lay down his arms and continued the partisan fight against invaders. Then, in the years 1299-1303, he went to European courts, seeking support for the Scottish case among the rulers. After his return to the country he was betrayed, captured by the English and cruelly tortured: his hands and legs were publicly broken, his belly was cut apart, his intestines were cut and then burned. When Wallace gave up his last breath, his body was chopped and rolled out all over England.
The rest of Scottish patriots did not abandon their dreams of independence. The new King Robert Bruce was fighting the Englishmen for 20 years, in 1314 taking the victorious Battle of Bannockburn with them. Scotland’s independence was finally recognised by the rest of the countries in 1328 on the basis of the Arbroath Declaration to the Pope:
We are not fighting for honour, neither for wealth nor for glory, but for freedom from which no real man can give up without his life.
Manfred von Richthofen was born on May 2, 1892, within the present-day borders of Breslau (Wrocław), in a Prussian aristocratic family with military traditions. He spent his childhood in Schweidnitz (Świdnica). A young Manfred quickly decided to pursue a military career. Initially, he served in cavalry units, specifically in the Prussian Uhlans Regiment, where he was assigned in 1911. However, after the outbreak of World War I, he felt unfulfilled by the mundane, monotonous life of a cavalryman devoid of combat and decided to resign from that unit.
He swiftly changed the course of his military career and volunteered first for the infantry and later for the German fighter squadrons. Rumor has it that in his application for transfer, he wrote, “I did not go to war to collect eggs from chickens but for a different purpose!”
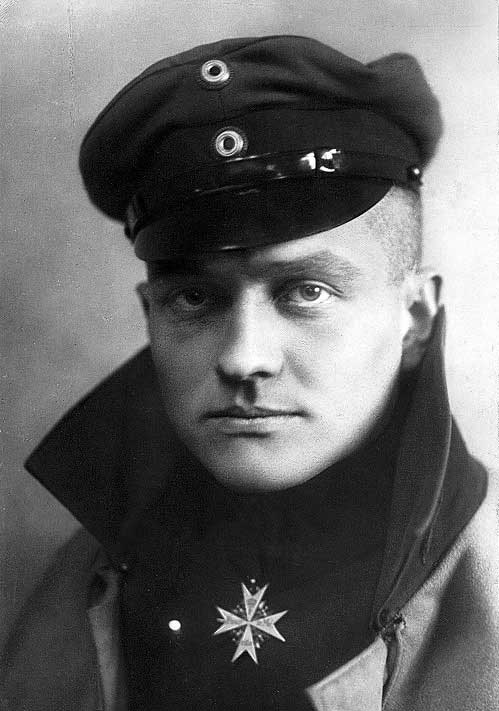
“Red Baron” Manfred von Richthofen Source: C. J. van Dühren, Public Domain
World War I was a pioneering era for aerial warfare. Fighter tactics were still being developed, and the German command, in particular, initially did not take aviation units seriously, considering them unreliable and unworthy of substantial resources. Flying itself was an act of madness: parachutes were not yet available, and pilots had very short life expectancies, with reaching the age of 20 being a rarity. Von Richthofen was a representative of the first generation of enthusiasts for aerial combat who laid the foundations for modern military doctrine.
Von Richthofen joined the air force in May 1915, and by July, after completing basic training, he was sent to the Eastern Front, where he conducted observation flights. In August 1915, he underwent combat training and served as a fighter pilot on the Western Front. Initially, he struggled: he had difficulties with handling the aircraft, and during his first flight, he even crashed the plane he was piloting.
Find the enemy and shoot him down. Everything else is nonsense.
Manfred von Richthofen
Manfred’s successes came with time. His first officially recognized aerial victory came on September 17, 1916, and by October of that same year, he had already accounted for five shot-down aircraft, which would have earned him the title of a fighter ace in Western armies. In September, von Richthofen joined the elite squadron of another German ace, Oswald Boelcke, who is known as the father of the German Air Force and a pioneer of aerial combat tactics. It was from him that the future “Red Baron” learned, and after Boelcke’s death in October 1916, von Richthofen surpassed his mentor as a soldier and leader.
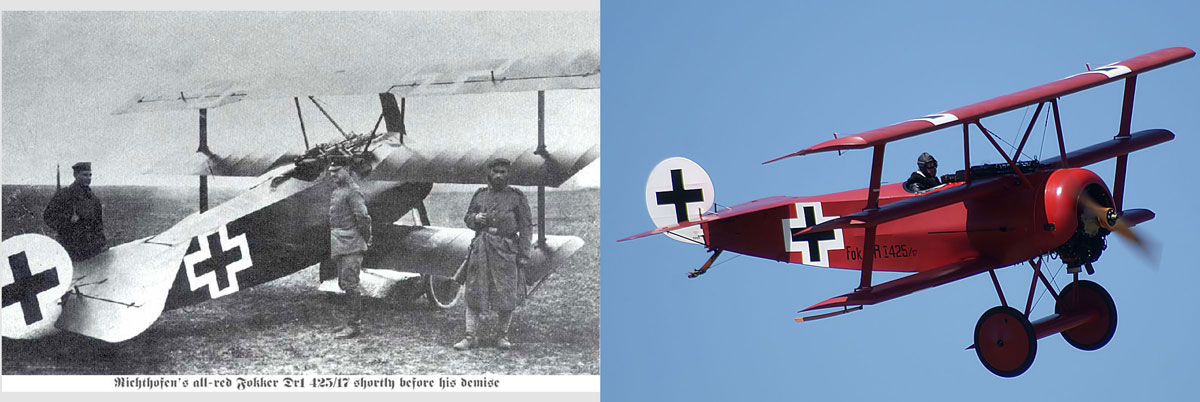
The Fokker Dr.I was the aircraft flown by von Richthofen. On the left is a photo from the period of 1917/1918, while on the right is a reconstruction from 2013. Right photo, author: Valder137 via Wikimedia Commons
November 23, 1916, was a significant day for von Richthofen as he achieved his most valuable victory – after a long battle and intense pursuit, he shot down British fighter ace Lanoe Hawker. By January 1917, he had already confirmed 16 kills, making him the top-ranking living German pilot. It was during this time that the “Red Baron” took command of Jagdstaffel 11, the 11th Fighter Squadron, which under his leadership transformed from one of the weakest squadrons in the German Air Force into a unit comprising the best German pilots. This squadron became unmatched during World War I.
Under von Richthofen’s leadership, Jagdstaffel 11 caused such significant losses to the British that April 1917 is still referred to as the “Bloody April” by the British. The losses they suffered were so immense that the expected lifespan of a British pilot dropped from 295 to 92 hours.
The squadron led by von Richthofen was indeed known as the “Flying Circus” because, like their commander, its pilots painted their airplanes with red paint. This is also where the nickname of the German ace, the “Red Baron,” originated from – it was derived from the color of his aircraft and his family’s aristocratic background. The distinctive red color of their planes made them easily recognizable in the skies, and it became a symbol associated with von Richthofen and his squadron.
Red Baron and his squadron Source: Flickr
The successes of the “Red Baron” and his men led the British to put a bounty on his head – 5,000 pounds sterling, a substantial fortune at that time. Meanwhile, von Richthofen and his squadron were deployed to various sections of the front, killing many Allied pilots in the process. In July 1917, Manfred was seriously wounded in the head. Despite the doctors’ objections, he swiftly returned to combat after a brief recovery. There was a period when the German high command, which capitalized on the legend of the “Red Baron,” asked von Richthofen not to take such significant risks and engage in combat less frequently, but he refused to comply.
Von Richthofen was always looking for a fight and did not shy away from risk. He fought for fame, for adrenaline, and he used to say that he felt like he was on the hunt during duels. His fighting style and tactics during clashes with Allied pilots could seem so daring as to be crazy. Despite his absolute ruthlessness in battle, Manfred respected his opponents and demanded this of his subordinates.
On 21 April 1918, Manfred von Richthofen took to the air for the last time. He was the only one not to return from the last patrol he led before his leave of absence. We now know that while flying over the Somme he was engaged in a duel with a Canadian from an RAF squadron, the ‘Red Baron’ came under fire from Australian troops taking up positions in French territory. Hit in the chest, however, he managed to land and died shortly afterwards. Initially, the shooting down of the German was attributed to Arthur Brown, the squadron commander. However, current research indicates that von Richthofen was hit by a missile fired from below by one of the Australians, from a distance of probably 750m
Funeral of Manfred von Richthofen at Bertangles cemetery in France Author: John Alexander via Wikimedia Commons
In accordance with the unwritten code of honour for military pilots, Manfred von Richthofen was respectfully buried by his recent opponents. His remains are now in a family tomb in Wiesbaden, Germany.
The figure of the ‘Red Baron’ was one of the most recognisable symbols of the Great War. He is remembered not only for his incredible combat effectiveness and commanding ability, but also because he was a co-inventor of the tactics and principles of air combat at the time of the formation of this type of armed force. Ruthless to his opponents, though guided by respect and honour, he made a lasting mark on history.
Interesting facts:
After his first victorious battle, von Richhofen ordered a goblet from a Berlin goldsmith with the date and model of the plane he had shot down. Over the course of the war, the order was repeated 59 more times, and then 20 more times using no longer gold – because the weakening Germany already had too little of it – but more common materials
Manfred’s brother Lothar also served in his squadron. The younger Richthofen also achieved fighter ace status (40 kills) and survived the war, but died in 1922 in the crash of the civilian aircraft he was piloting
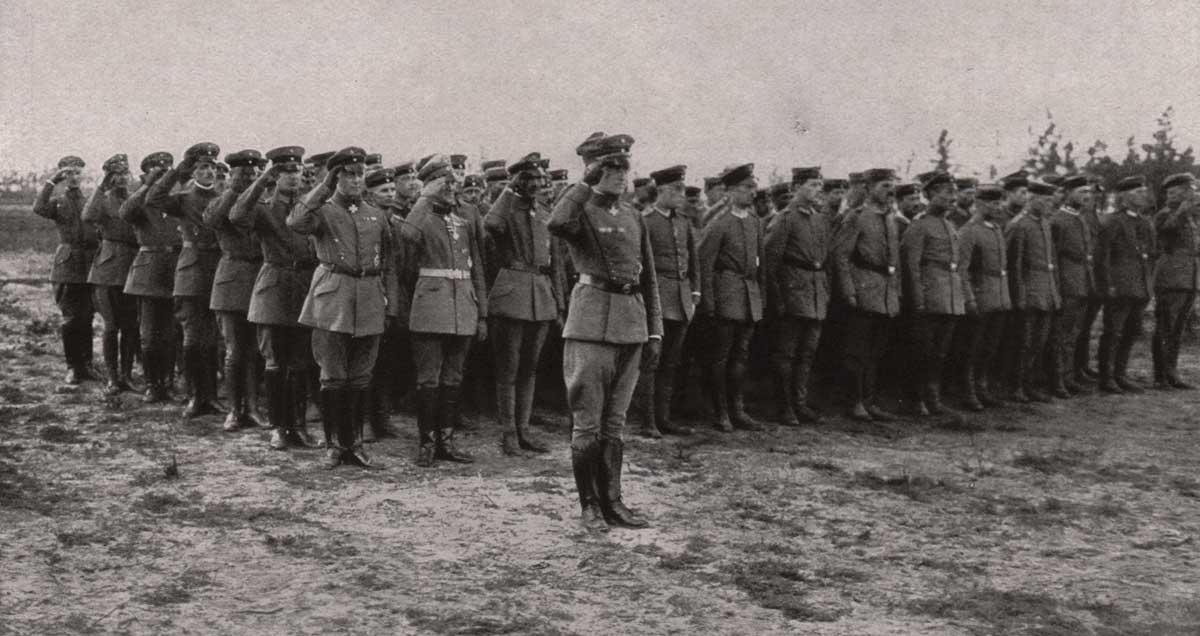
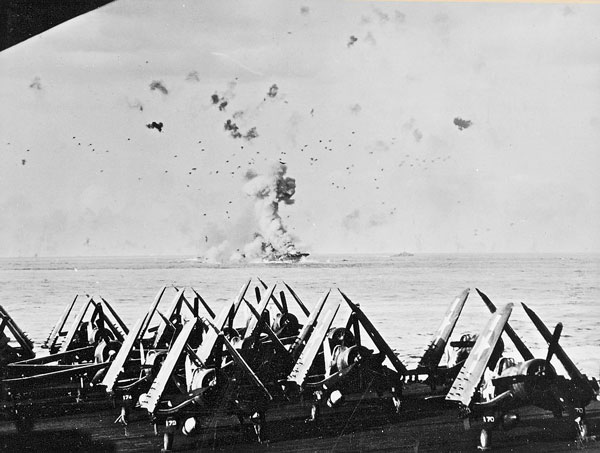
At the end of 1944, a battle for control of the Philippines broke out between the Empire of Japan and the United States. This important battle in some ways resembled a clash between David and Goliath, because the Japanese lost almost 300 planes at the beginning of the fight, mostly shot down by American fighters (this event is referred to as “Great Marianas Turkey Shoot” – a great shooting to turkeys over the Marianas). One of the reasons for the Japanese defeat was the fact that the famous Mitsubishi Zero fighters were clearly distant from the American Hellcats, although still in 1942 they themselves dominated the air. Hundreds of American airplanes took off from aircraft carriers in the Philippines in the decisive phase of the struggle against the 30 Japanese Zero fighters.
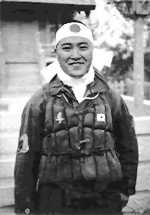
Kiyoshi Ogawa, the pilot who hit the aircraft carrier USS Bunker Hill on May 11, 1945 Source: Wikimedia Commons
The heavy losses of the Imperial Navy meant that it could not only not make up for the loss of equipment, but also provide recruits with adequate training. The quality of pilots’ training was getting worse and worse and they were being sent to battle quicker than before. In this hopeless situation, the Japanese command agreed to a crazy plan of Rear Admiral Ōnishi Takijirō, who intended to send suicide pilot teams against American ships. In these squadrons, fast called “special units of attack” (and unofficially baptized as Divine Wind, Kamikaze) were to be served by volunteers, elite of the Japanese armed forces, and their task was to “hit with the body” (tai atari) American ships – meaning simply death to the pilot by flying into hostile warship. Potential damage was to be increased by 250kg of bombs attached to their planes.
Despite the fact that the Japanese command did not agree to present to the pilots the formal order of a suicide attack (which was to be voluntary), nobody had any illusions about their intentions. The pilots who became Kamikaze knew exactly that their chance of survival was to be zero per cent and they were expected to take as many enemies as possible with them to the other side. Contrary to appearances, pilots were hungry to have the opportunity to give their lives in defense of their homeland.
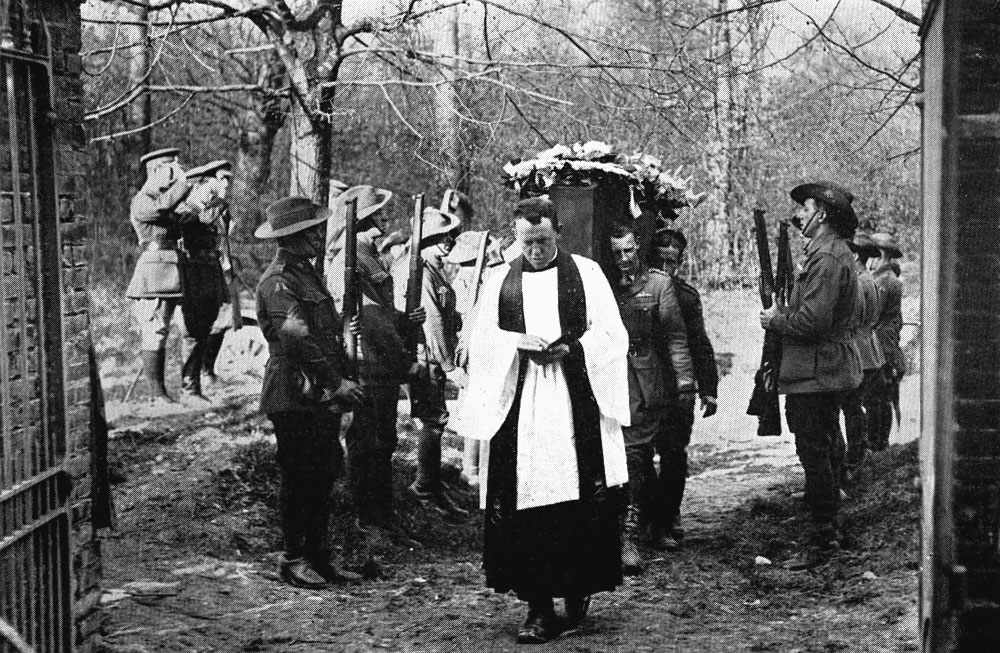
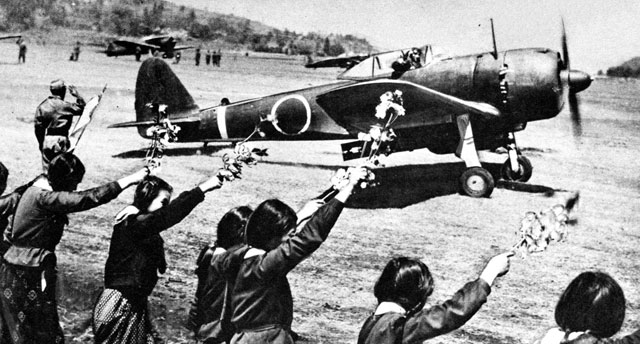
Japanese high school students use cherry branches to bid farewell to the pilot of a kamikaze named Toshio Anazawa, who was flying towards Okinawa for his last mission. Source: Hayakawa via Wikimedia Commons
Japanese Divine Wind against the US Navy
The first mission of the Kamikaze units was already successful. On 25th October 1944 one of five Mitsubishi Zeros managed to hit and sink the American airplane carrier USS “St. Lo”. Another aircraft carrier USS “Santee” was also hit, but the Japanese did not manage to destroy it. After the event, the Japanese command finally became convinced of the Kamikaze and, as time went by, this strategy became more and more common – all the more so as suicide pilots did not have to undergo all the training for fighter pilots, so they could be sent to combat more quickly. Since the summer of 1945 they have not even been taught to land…
During the battle for Okinawa from April to June 1945 Japan wanted to annihilate the American invasive fleet with the help of the “Kikusui” plan (jap. “Floating Chrysanthemum”). The strategy of defending the island was to attack the US Navy every few days with the use of waves counting several hundred planes each kamikaze. The first strike of Kikusui was carried out on 6 April 1945. The Japanese cover group that was to divert attention from the kamikaze was annihilated by American fighters, but 200 suicide pilots sank three destroyers, a landing ship, two carrier ships and damaged 22 units. How much of a problem they caused the Americans that day can be seen from the fact that 38 sailors were killed from the fire by shells of their own anti-aircraft missiles.
In the last months of the war about 3800 young pilots were sent to death, out of which 2200 managed to fly to the area close to American ships. The others were stopped by machine failures, lack of fuel, or simply lack of navigation skills. It is estimated that at the end of 1944 even 28% of the pilots managed to hit their target. Six months later, however, it was less than 10%, and the damage inflicted on the Americans was still small, because their ships were mostly only slightly damaged.
Suicidal “cherry blossom”
Unknowingly, the precursors of the kamikaze were two airmen: Captain Tomonaga and Captain Murata. The first fought during the Battle of Midway. After returning from the morning air raid, he noticed that his airplane’s tank on the left wing was damaged, but in spite of that, he ordered the other one to be refueled and flew out to fight. His airplane survived the air raid, but he had no fuel back and fell into the water while returning to the base, killing the brave pilot. The second, Captain Murata, fought at Santa Cruz with a heavily damaged aircraft. Instead of fleeing, he decided to sacrifice his life and hit the American aircraft carrier USS Hornet.
Kamikaze pilot in tied “hachimaki” Source: Wikimedia
Because of these two characters, Rear Admiral Ōnishi Takijirō advised pilots to “Fly one way like Tomonaga and crush an enemy ship like Murata”. Before going on their last mission, the aviators were gathered in a room where the officers read to them fragments of the Bushidō code, as well as short poems and letters left by previous kamikaze. In order to create even more of a samurai spirit in them, they took the katana swords to their planes to die with them – as befits the real Japanese warriors. Before their departure, they raised a sake toast with officers, said goodbye to friends, and then boarded their planes to set off accompanied by patriotic songs sung by the ground crew. They took to the cockpit, apart from the swords, photographs of their loved ones, portraits of their forefathers and a knife they would cut their lives with if they survived the flight by some miracle. The kamikaze pilots’ machines were in the best possible technical and visual condition because they were to become the coffins of the people who piloted them.
Flying towards American ships, the kamikaze were dying with the scream “Banzai!” (jap. [let the Emperor rule] ten thousand years!) or “Hissatsu!” (certain death).
Suicide pilots mostly used standard aircraft of different types, such as Mitsubishi A6M5 Reisen. At the end of the war, rocket-powered planes were introduced to service, Ōka (Japanese: “The Cherry Blossom”), which had a very high diving speed, but had a small range, so in order to fly to the Americans, they had to be attached and carried under the hulls of medium-sized bombers Mitsubishi G4M3, which relatively often ended up shooting them down.
Could the kamikaze change the course of the war?
From a purely military and economic point of view, such a strategy was completely unprofitable and the Japanese command knew this very well. It was about an ideological message for society as a whole. The young pilots sacrificing their lives were to be the signal to the warring nation, for whom their death was to “shine like a shattered jewel” – that is, be a heroic victim in the hour of the highest rehearsal. The Kamikaze were supposed to mobilize their compatriots for a greater effort and to keep the war mood in society. Pilots sent on suicide missions were supposed to write letters explaining their decisions and thus encouraging others to do the same. If the nation’s elite, educated aviators, were to go to “beautiful death” without hesitation, then why should the rest of Japan complain about small food rations, the amount of work or other inconveniences resulting from the fact of waging war? The Kamikaze were a tool of propaganda in the hands of their superiors.
Kamikaze strikes the USS Enterprise aircraft carrier US Navy via Wikimedia Commons
There are large discrepancies in the calculations of exactly what the kamikaze did to the American ships (Sometimes it was difficult to say why exactly the sunken ship went to the bottom), but it is cautiously assumed that Japanese suicides took with them more than 6,000 American sailors. Of all US Navy ship losses in the Pacific, 48% have been damaged and 21% have been sunk by kamikaze. Although these percentages may make an impression on the reader, the military significance of the “divine wind” was still small, but the psychological significance was different.
The attacks of the kamikaze had a very demoralising effect on American sailors. They even managed to arouse panic in them, and then these people were incapable of fighting. Americans were afraid of Japanese suicide pilots and did not understand their motives. The plane rushing towards the ship was extremely difficult to stop (the cold blood of the pilot was more important here), and the vision of death did not discourage the airmen of the elite of the imperial army at all.
The fanatical and desperate strategy of suicidal raids also had other effects, even of a political nature. After the capitulation of Japan, General Douglas McArthur was gentle on the emperor, whom he left on the throne because he did not want to risk confronting the “100 million kamikaze” with the possible rise of civilians. On the other hand, the hopeless resistance of the defenders and their senseless dragging of the war caused the Americans to justify to the rest of the world the use of nuclear weapons in Hiroshima and Nagasaki, which ended disastrously for Japan.
Below is a coloured recording of the attacks of the kamikaze on the American fleet during World War II:
In order to give a solid summary of the so-called “Miracle at Dunkirk,” the successful evacuation of hundreds of thousands of Allied troops locked in a German encirclement on the shores of the English Channel, it is necessary to start the story at the beginning of World War II.
Great Britain at the beginning of World War II
When on September 1, 1939 Germans attacked Poland, despite the Poles hoping for a quick end to the conflict, Britain and France did not launch a massive offensive in the west, but passively awaited Adolf Hitler’s moves. This period is now called the “Phoney War”, as the war against the Third Reich was carried out only on paper.
Nevertheless, the British knew that sooner or later they would fight against the Germans and were hopeful of their own armed forces – in the end their navy was considered the strongest in the world, and land forces were not weak. Before the conflict started, there was enthusiasm in the Isles.
German soldiers in Oslo after the seizure of Norway Author unknown, collection of Norwegian Encyclopedia
German offensive in the west
Opposing the Third Reich’s aggression to Norway, the United Kingdom sent its troops there in the spring of 1940. Unfortunately, Germans literally ran after them – aggressors were better commanded, better equipped and more willing to fight. The British lacked equipment (there were cases of lack of weapons, which were sent too late) and their command was extremely chaotic. Ultimately, the Germans occupied Norway with minimal losses of their own, which for the proud islanders was a cold shower from which the Allies – in order to win the war – had to draw conclusions.
Taking on the responsibility for the failure of this operation and the early concessions to Hitler, British Prime Minister Neville Chamberlain honorably resigned on 10 May 1940. His immediate replacement was Winston Churchill, whose first day of office coincided with the day of the German offensive in the west. As we know from history, this was an extremely brilliant and successful campaign – German armored divisions with the support of the Luftwaffe captured Belgium and the Netherlands without much resistance, thereby opening the way for the invasion of France.
German Junkers Ju 87 dive bomber, which was involved in the Dunkirk attack
Allies trapped
The British and the French sent 40 of their best divisions to Belgium, including the entire British Expeditionary Corps. These forces, however, had a big problem – the French lacked weapons, food, training, and morale above all, so they did not exhibit outstanding combat value. The Allies were hoping to stop the aggressor in Belgium before it could get to France. The Germans, however, went through the Ardennes, which totally surprised Western strategists. After breaking up a few French troops, General Guderian’s German armored columns began an unstoppable march westward, then north to the Channel. Only two days after crossing the border, 7 German armored divisions were under the Sedan, brutally strangling the few defenders of resistance and taking over thousands of French soldiers.
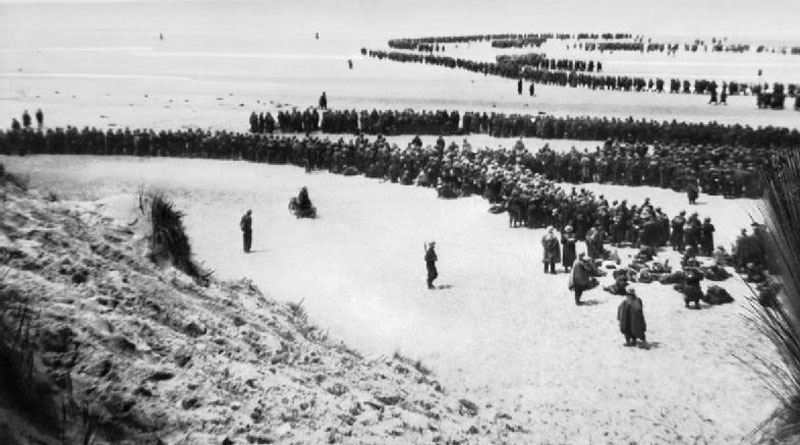
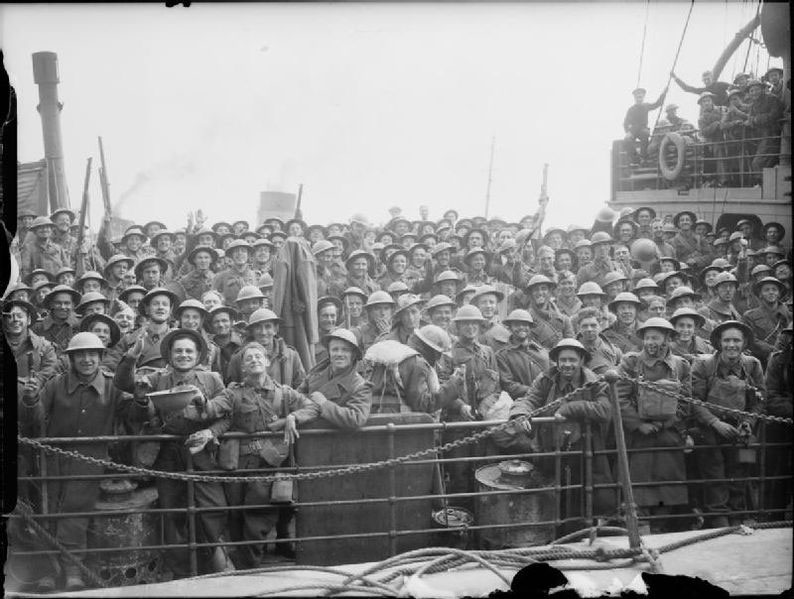
The British are waiting to evacuate from the beach near Dunkirk Author unknown, collection of Imperial War Museum
Heroic defense of the beach and evacuation of allied forces by the English Channel
As you may have guessed, the Third Reich was intended to close and destroy the Allied forces which were defending Belgium. The British and the French were in dire danger – the Germans attacked both from the east and the south, from France. Despite the murderous pace of retreat to the west (50 km from 25 to 28 May), the ticks of the German war machine quickly and mercilessly closed around them. Eventually, the Allies took refuge on the beaches of Dunkirk: a small port in northern France, behind which they had the English Channel, and before them – prevailing, victorious forces of the Third Reich. Western soldiers knew well that unless a miracle happened, Dunkirk would become their last battlefield.
The dramatic defense of the beach and harbor against German infantry attacks began. At the same time, on 26 May, the Dynamo Operation, the evacuation of allied troops by the English Channel, was launched. The operation involved 851 units – warships under the flag of Great Britain, France, Poland and also Dutch and Belgian ships. Interestingly, a countless number of fishing boats, motorboats and other private boats joined the campaign. Their owners, in spite of the great danger of the German navy and aviation, voluntarily took to the Islands trapped under Dunkirk soldiers.
But in order to evacuate, the Allies had to withstand the overwhelming assaults of the German infantry. A particularly bloody harvest among the defenders was the Luftwaffe attacking ruthlessly from the air. The total massacre of the Allies was prevented by RAF fighters, which heroically restrained German Stukas bombers. The British Air Force paid a high price for its heroism – over 100 planes and 60 pilots were lost over Dunkirk. Generally speaking, in the battles over France the RAF lost half of its machines.
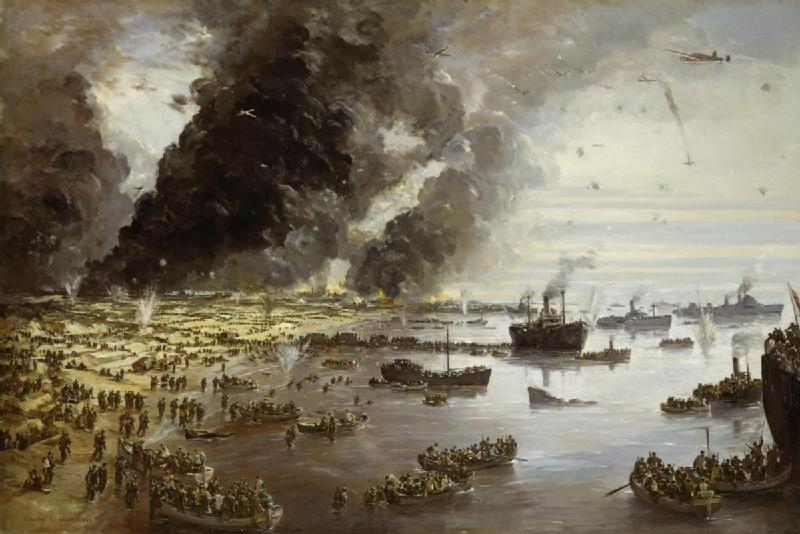
Evacuation of Dunkirk Author: Cundall, Charles Ernest, Art.IWM ART LD 305, Imperial War Museum
Disaster, yet a miracle
The evacuation ended on June 4. In total, more than 340,000 people were rescued from the port and beaches, including 200,000 Britons and 140,000 Frenchmen, Belgians and other Allied troops. Before the start of Operation Dynamo, the British headquarters estimated that the Navy will be able to save 10 times less people from Dunkirk.
The losses of the British Expeditionary Corps amounted to about 30,000 killed and wounded, and 40,000 captured. Huge amounts of equipment were destroyed, because the retreating Allies did not want to leave anything to Germany: 76,000 tons of ammunition and 600,000 tons of fuel, 1,200 guns and 60,000 vehicles were lost. In addition, Germany has managed to destroy 6 destroyers and more than 200 other vessels. Such huge losses happened at the least opportune moment and had to be quickly recovered.
British soldiers after returning home Author: Puttnam (Mr) and Malindine (Mr), collection of Imperial War Museum
Hitler’s mysterious decision
So far, the fact remains that when the German tanks were tramping on their heels and gathering bloody harvest among defenders, something extraordinary happened, and one of the greatest secrets of World War II – Adolf Hitler’s personal order had cancelled the armored division’s attack. Their lack of participation in later battles for Dunkirk probably presumed that the Allies were not massacred there. There are several hypotheses trying to explain why this happened:
Apparently, Hermann Göring assured Hitler that his dive bombers would be enough to destroy the encircled allied forces,
Hitler wanted to save his armored divisions from further campaigns in France
Saving the Allies could have been seen as the last chance for negotiations – but this possibility is often dismissed by historians.
The evacuation of Dunkirk ended with a failed western campaign for the Allies. Despite huge losses in equipment, the Dynamo operation was considered a miracle, because miraculously the catastrophe was avoided – the soldiers who survived could return to the British Isles and in the future continue to fight. After the fall of France, Britain was on the battlefield itself, and as history showed, it was the beginning of a long and hard war.
The complex known as the Wolf’s Lair covered an area of about 250 hectares. It consisted of approximately 200 buildings, including shelters, barracks, two airports, a railway station, a power station, water supply systems, heating plants, and two telegraph centers. The concrete walls of the bunkers were several meters thick to provide the possibility of surviving enemy fire or an air raid. Hitler’s bunker had a ceiling thickness of up to 10 meters and walls up to 8 meters thick.
A total of 30,000 to 50,000 people worked on the construction site. By 1944, over 2,000 people worked there, including only 20 women. Interestingly, Eva Braun, Hitler’s wife, never stayed at the Wolf’s Lair.
The location was chosen deliberately as it was located far enough eastward that it was not threatened by British air raids at the beginning of the war. At the same time, it was possible to coordinate later military activities on the Eastern front.
The Wolf’s Lair was perfectly camouflaged. Its location was favorable, surrounded by lakes and forests, and the buildings were carefully disguised. The whole complex was carefully fenced, and no one could approach it. The perfection of the camouflage is evidenced by the fact that the Wolf’s Lair has never been bombed.
Thanks to the surrounding forests, the buildings were practically invisible from the air. However, in winter, when the leaves fell, German engineers covered the buildings with mortar mixed with seagrass brought especially from the Black Sea. In this way, the falling snow stopped in the plaster’s cavities, and the buildings masked themselves.
The German leadership was so confident in the effective concealment of the Wolf’s Lair from the prying eyes of outsiders that after the construction of this headquarters, airplanes flying from Berlin to Moscow flew right over it. This was a psychological ploy designed to show the world that there was definitely no military object under Kętrzyn.
At the beginning of its existence, the “Wolfsschanze” served Adolf Hitler as a command center during Operation Barbarossa, the German attack on the Soviet Union in June 1941. The German dictator arrived there for the first time on June 24, two days after the war began with its former ally.
As the front progressed in Russia, the Germans built another headquarters for Hitler in Ukraine, but it was no longer such an engineering masterpiece as the complex in Masuria. The Wolf’s Lair remained Hitler’s favorite field headquarters, where he stayed (with breaks) for over 800 days: from June 1941 to November 1944. At the end of the war, as Germany lost its conquered territories on the Eastern Front, the headquarters was moved to Zossen near Berlin on November 20, 1944.
Hitler traveled to the Wolf’s Lair by air or by train from Berlin to Kętrzyn. The route of the Führer’s train was often changed at the last minute and kept secret because of fears of an assassination attempt. As it turned out, this habit saved him at least once: in the spring of 1942, Polish partisans learned of Hitler’s planned train ride and carried out a sabotage operation to derail the train. Sources indicate that the plan was successful, but due to a change in the route of the Reich’s leader, a regular train traveling from Königsberg to Szczecin was mistakenly derailed, with 430 Germans on board.
The Wolf’s Lair was the site of the famous assassination attempt on Hitler on July 20, 1944, when Colonel Claus Schenk von Stauffenberg planted a bomb in the room where a meeting of the highest-ranking Wehrmacht commanders was taking place. The plan failed because the high temperature that day forced the meeting to be moved from a concrete bunker to a lightweight barracks, and the shockwave did not stop at the walls of the structure but dispersed, weakening in the process. Additionally, the thick oak table shielded Hitler from the blast, and the German dictator was only slightly injured, while Stauffenberg and the other conspirators were immediately captured and executed.
In addition to Hitler, other Nazi dignitaries also visited the Wolf’s Lair, including Hermann Göring, Heinrich Himmler, Joseph Goebbels, Fritz Todt, and Albert Speer.
When the Germans withdrew from Masuria, they decided to blow up the Wolf’s Lair. It took around 8 tons of TNT to destroy the complex.
The area around the Wolf’s Lair was completely cleared of mines only in 1955. Engineers had to deal with 54,000 mines on 72 hectares of forest and 52 hectares of land.
Today, the Wolf’s Lair is a tourist attraction visited by over 250,000 people annually. We encourage you to see the complex for yourself. Below is a map and a link to website with information for tourists


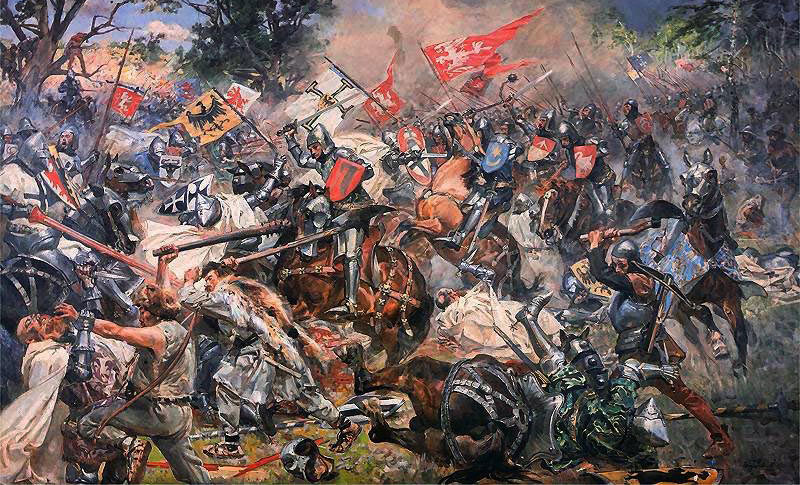
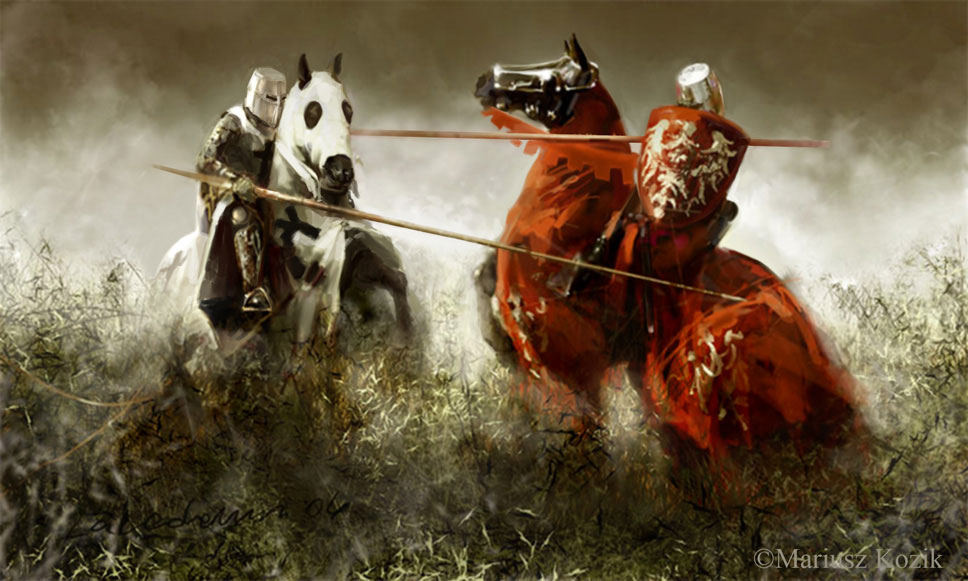
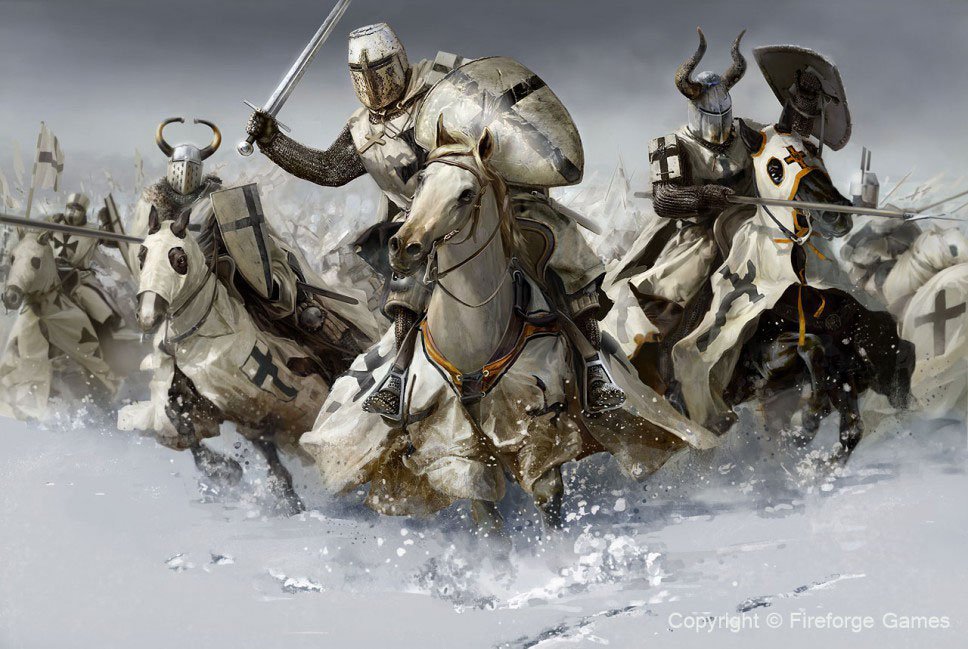

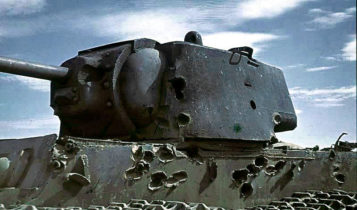
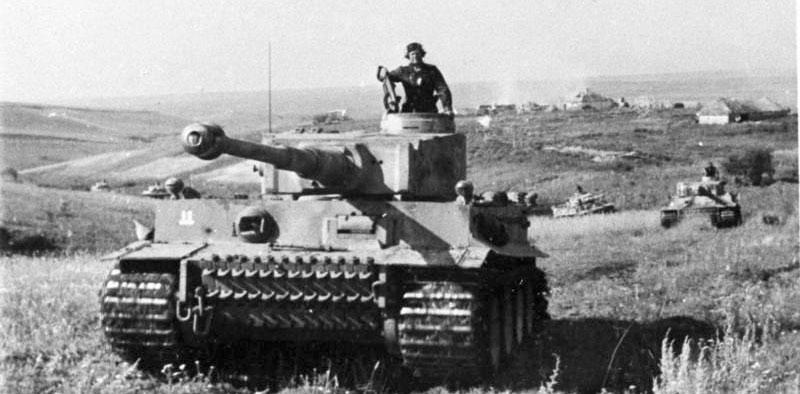

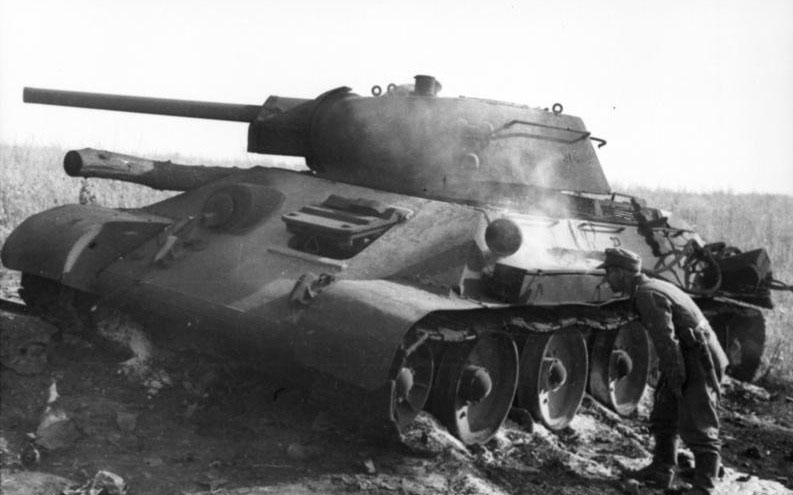
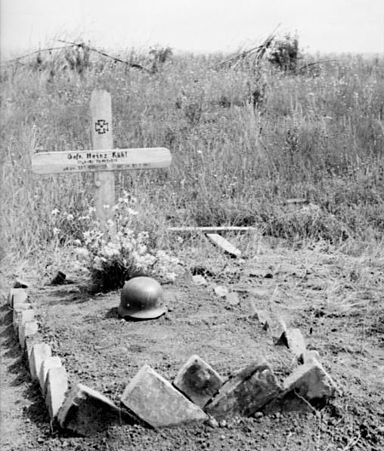

 Empire strikes back")