Author

kraducki

Browsing

The German invasion was a powerful blow to the economy of the Soviet Union, whose GDP fell by 34% between 1940 and 1942. Industrial production for almost a decade did not return to its 1940 level. Despite the fact that Germany occupied only 3% of the USSR’s area, almost half of Stalin’s armaments factories were located on this piece of land.

As early as June 30, 1941, the Soviets established the State Defense Committee, i.e. the organization managing and coordinating the transport of industrial centres to the east, far from the approaching rapid pace of the Germans. The Committee, which had virtually unlimited authority to evacuate people and equipment, used everything that could have helped in any way – mainly the Soviet railway fleet. Even outdated locomotives and wagons in poor technical condition were used in acts of desperation.
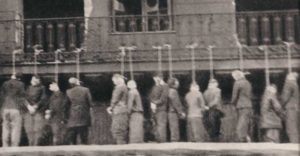
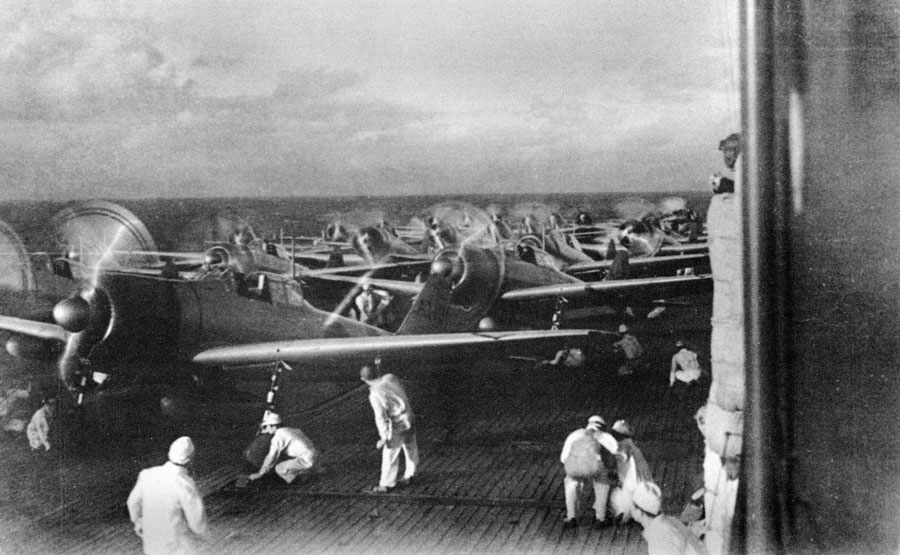
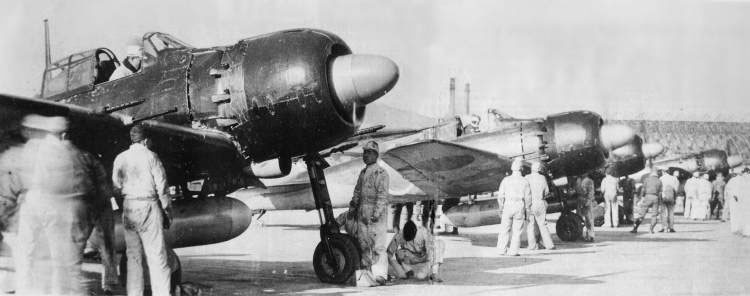
Factory with Russian Yak fighter planes being manufactured on an assembly line
picryl.com

The evacuation focused on factories located in the territory of present-day Ukraine and the Moscow area, i.e. industrialised areas, the loss of which the Red Army feared the most. In each of them an evacuation council was created, which consisted of the directors of the factories, engineers and, of course, political officers. Movements of each of the factories began with the export of items that did not affect the current production, such as overstock. The specialists divided all machines and other equipment into categories, which were to indicate how important the equipment was and how difficult it was to dismantle and reassemble. Interestingly, in the relocated factories, production was to remain intact until the very moment of evacuation, which often took place dangerously close to the arrival of the front.

As you probably guess, despite planning, during the nervous relocation of factories, chaos, lack of coordination and human error often occurred. Managers and workers had to improvise. Most often there was a lack of equipment capable of loading machines (such as rolling mills or forging dies), which weighed several dozen tons each. In such cases, such colossuses were painstakingly dismantled into parts, and it often turned out that some of them had been welded earlier. Trains transporting equipment from factories were overloaded and overcrowded. Nobody worried about something like the maximum load on the train depot – after all, the motherland needed this equipment several hundred kilometers away from the Nazis running eastwards. Here, however, the problem often arose because the Soviet rails were made of poor quality steel and were damaged by the heavy trains moving on them.

When the machines couldn’t be carried, it was only possible to destroy them so that they wouldn’t fall into the hands of the Germans – but it was rare, because it was extremely difficult to get explosives.

It is worth mentioning here the contribution of Soviet railwaymen, who took the subject of evacuation extremely seriously. Not only did the trains take people and equipment away from the frontline, but also transported millions of soldiers to the battlefields. From Moscow alone, 80,000 wagons transported machines and parts from almost 500 factories.

KV tanks during assembly at the factory in Leningrad
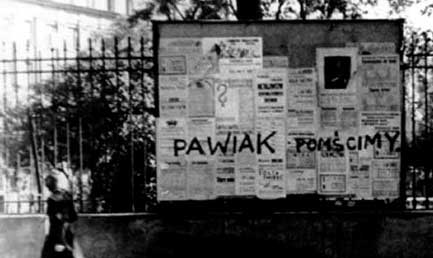
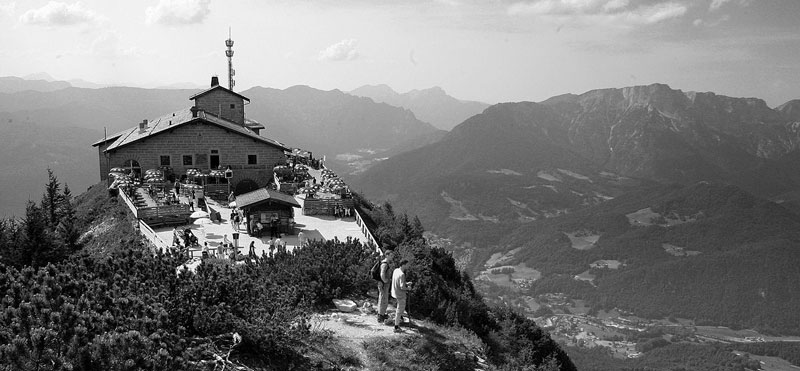
Deror_avi via Wikimedia Commons

Throughout the evacuation period there were serious shortages of food, people and equipment. However, the worst were the problems that affected the railway vehicles, i.e. the high failure rate of wagons and locomotives, their low accessibility and the ” jamming” of the railway routes. Every day thousands of wagons were disposed of at stations for many hours, which caused delays in the evacuation of the USSR industry. It happened that one train stood at the station even for a few weeks! In addition, the maps used by railwaymen were often full of errors. Soviet cartographers were ordered to purposefully falsify the maps if they were to get into the hands of the Germans.

In addition to machines and equipment, trains also deported people – mainly factory workers and their families. Their travel conditions were often really tragic, as the wagons were often unheated and lacked space to sleep, which most often resulted in sleeping between machines on blankets, clothes or sawdust. Travellers in this way also suffered from a lack of food, water, and colds caused by severe frosts.

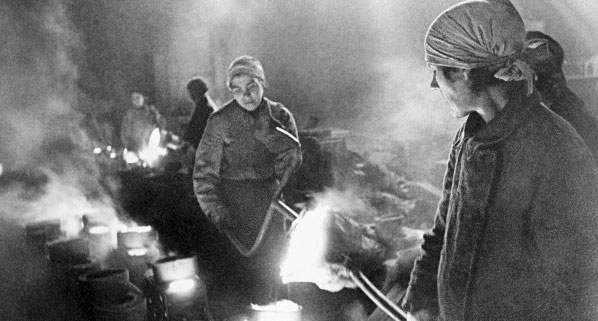
If the transport from the factory had already managed to reach its destination, it did not mean the end of the difficulties, because the equipment had to be unloaded and returned. Often there was a lack of documentation, parts were lost or stolen along the way, and all this was accompanied by terrible working conditions. The workers worked up to 14 hours a day, and because of the lack of hands, women and children were not spared either. The communist authorities of the USSR also reached for Gulag prisoners. Heavy, physical work combined with malnutrition, frost and lack of accommodation meant that many people did not survive.

Despite all these difficulties, as well as the organizational chaos and warfare that spread across more and more of the USSR territory, it is estimated that by the end of 1941 more than 1500 large factories were deported, together with millions of workers, engineers and their family members. Nearly 500 factories were moved to the Urals, more than 200 to Western Siberia and 250 to Central Asia. The others were evacuated further east, even off the Pacific coast. Locations rich in raw materials and far from the front were chosen so that they would not be exposed to Luftwaffe air raids.

Women casting metal in a factory in besieged Leningrad
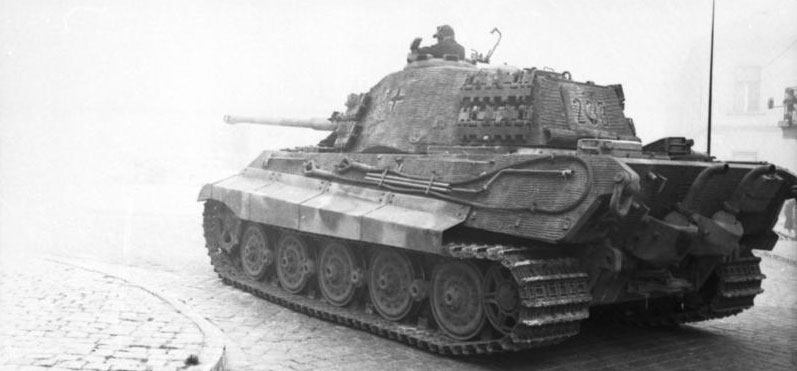
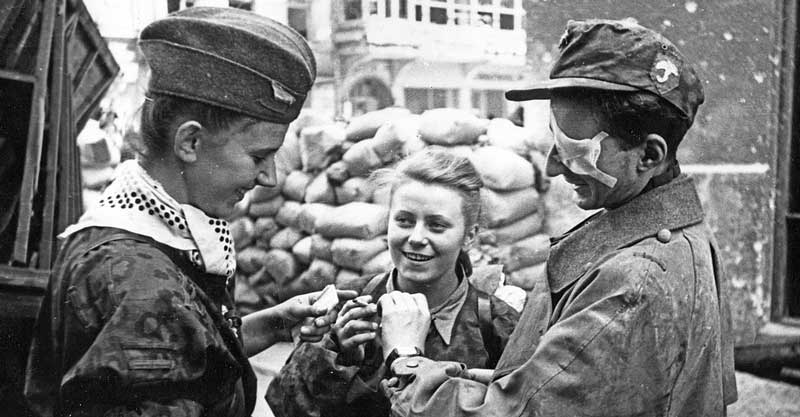
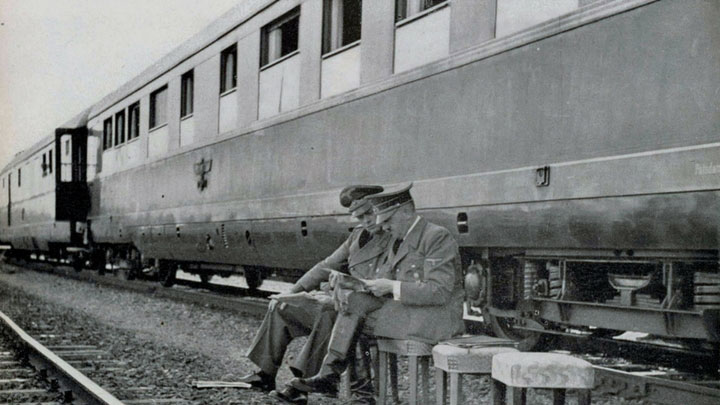
Vsevolod Tarasevich via Wikimedia Commons

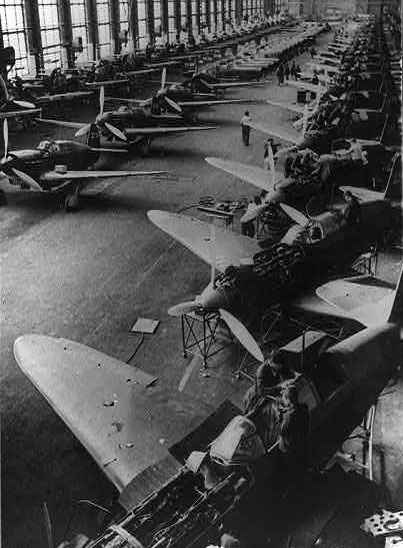
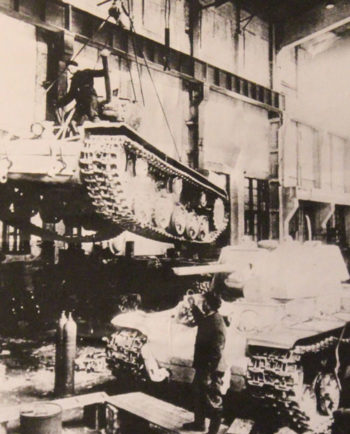
During the rescue of the factories, priority was given to the military plants and they were the fastest to transport and restart – there were individual cases even a month after the start of the relocation. The first T-34 tank assembled in the relocated factory (Nizhny Tagila in the Urals) left the production line already in December 1941, and most of the military production started in the first half of 1942, just before the Stalingrad Battle, which began in August 1942 and was the turning point of the Second World War for the Soviet Union. It is worth mentioning that the hasty launch of production had an impact on the poor quality and higher failure rate of the manufactured weapons – an example of this can be the already mentioned medium T-34 tank, which, depending on the place of manufacture, could even have slightly different dimensions from the same type of tank produced in another factory.

But not everything came out as it should. Nearly 300 factories did not reach their destination at all – they simply got lost in transport, were stolen or taken over by the Germans. Some of the plants were too difficult to relocate (such as smelters) and sometimes even attempts were not made to export, but were destroyed on the spot. It happened that the Germans approached the factory too quickly and its crew, in order to avoid the Wehrmacht seizing the equipment, sent it east by the first better train. The cargo left on its own could circulate around the country even for months and if it wasn’t stolen by some miracle, there were a few cases of unloading such machines and starting production in a completely different place, with the help of other people than originally assumed!

In the long term, the USSR industry benefited from the evacuation action despite the great chaos that accompanied the whole operation. Powerful industrial centres were created and many factories were built or expanded, such as the factory in Chelyabinsk, where tanks were produced. This factory was so large that the whole city was called “Tank City”. In addition, a more efficient system of work was developed in many factories by tightening ever lower time limits for the production of equipment.

Destination – Egypt!

The year 1797 was extremely successful for France. Its Army of Italy, commanded by the young general Napoleon Bonaparte, contributed to the conquest of northern Italy and the lands on the western bank of the Rhine. The same Bonaparte also negotiated a very favorable peace treaty with Austria for the French.

Napoleon’s achievements were so impressive that the members of the French Directory (the executive power in revolutionary France) began to fear the general, worried about their own positions. They immediately decided to assign him an impossible task in order to undermine his standing among the public. There could be only one objective, and that was, of course, the invasion of England—France’s greatest rival.

As soon as Napoleon inspected his army stationed in northern France, he quickly realized that an attack on the British Isles was practically impossible. He knew that naval superiority was essential, but the unrivaled English sailors dominated the seas and would never allow Bonaparte’s ships to approach their homeland. Therefore, he devised two alternative invasion targets: the occupation of Hanover or the conquest of Egypt. The latter option seemed to offer nothing but advantages.
First, controlling the Suez Canal would severely disrupt British trade with India, dealing a significant blow to their economy. Second, establishing a colony in Egypt was meant to compensate the French for their previously lost colonies. Third, beyond military and economic objectives, the expedition also had a scientific purpose, bringing along a group of scholars—including mathematicians, engineers, astronomers, naturalists, geographers, chemists, architects, and many other educated Frenchmen.

Fallen at Aboukir, French commander François Paul de Brueys d’Aigaliers
Wikimedia Commons

Napoleon’s proposal was accepted and preparations for the invasion quickly began. 54,000 men were taken on the expedition, including 13,000 sailors of the navy and 3,000 of the merchant fleet. The rest were mainly more than 34,000 soldiers, concentrated in half-brigades of infantry, cavalry, artillery and others. As for the fleet, 72 warships sailed to Egypt. The core consisted of ships of the line, such as the flagship L’Orient, Guillaume Tell, Franklin, Tonnant, Spartiate, Genereux and others. In addition, the invasion fleet included excellent frigates, corvettes, as well as smaller vessels. All these ships were divided into three squadrons and an escort convoy. Admiral Francois-Paul de Brueys became the fleet’s commander, and at the same time took charge of the “red” squadron on L’Orient. The “blue” squadron was commanded by Rear Admiral Blanquet du Chayla on Franklin. The last squadron had under orders, known to us from under Trafalgar, Rear Admiral Pierre Charles Villenueve on Guillaume Tell.

The fleet set sail on May 19, 1798, heading toward Malta, whose central location allowed for control over all Mediterranean shipping. Along the way, the island—then under the possession of the Order of St. John—was seized by Napoleon’s soldiers, who carried out necessary ship repairs and replenished supplies.
Next, the French fleet set course for Crete, where bad weather forced a 24-hour stopover. As it later turned out, this delay saved Bonaparte’s ships, as it caused them to narrowly miss a confrontation with British Admiral Nelson.

The French fleet reached the Egyptian coast on June 29. The landing was to be carried out near the port of Alexandria, but the plan was hampered by very bad weather and high tide. French officers advised Bonaparte to wait out the poor weather conditions, but he firmly refused.

“We don’t have a moment to lose, fate has given us only three days. If I don’t use them properly – we are doomed!”

He was referring here to Nelson’s fleet, which could arrive at any moment. Despite these adversities, the French infantry launched an assault on Alexandria and quickly captured it, but then a serious problem arose, as it turned out that ships of the line and frigates could not enter the Alexandrian port, which proved to be too shallow for them. It was quickly decided to move the army to Aboukir Bay, more than 20 kilometers from Alexandria, and the French began to camp there as early as July 7.

Bonaparte and the other French commanders did not know that Aboukir would soon be the place where their proud fleet would perish.

Royal Navy in pursuit of the French

British Admiral Horatio Nelson
Lemuel Francis Abbott via Wikimedia Commons

Against Napoleon’s fleet, Britain sent a squadron commanded by none other than the famous Sir Horatio Nelson – one of the most distinguished naval commanders in history, a brilliant strategist, adored by his own soldiers and feared by his opponents. First Lord of the Admiralty Lord Spencer wrote to Count St. Vincent (commander of the English fleet in the Mediterranean) about sending Nelson in pursuit of the French this way: “I rejoice to send Sir Horatio to you, not only because I am convinced that I could not have found a better, more capable, and more devoted officer, but also because I know how much you wished to have him under your orders.” Such a recommendation said a lot about the skills of the later conqueror of the French fleet.

Nelson and his squadron had known from the start that the French had set sail. The English were determined to find Bonaparte’s ships and engage them in battle, but they were unaware of the expedition’s destination. As a result, they roamed the Mediterranean, first missing the French landing near Alexandria and then failing to spot their fleet entering Aboukir Bay. When the delayed Nelson finally saw the French ships off the coast of Egypt, he was devastated. He decided to engage the core of Napoleon’s fleet, which was stationed at Aboukir.

Before this time tomorrow, I shall have gained a peerage, or Westminster Abbey.

Preparations for the coming clash have begun on English ships.

Comparison of the strength of the two fleets

No one doubts that at that time the British Navy was the strongest navy in the world. It consisted of nearly 500 warships of various types, of which as many as 146 were ships of the line, that is, vessels performing a similar role to battleships in the early 20th century. British commanders were experienced and reliable, and the ships’ crews were well-trained – for example, under Aboukir, gunners serving on Royal Navy ships fired with three times the frequency of French ones. For good reason, English sailors had an unshakable sense of their superiority over the French.

The French fleet, although it also had a long and at times glorious history, was far from its peak during the Napoleonic era. The recent French Revolution had led to the death or exile of many skilled officers, while the warships were rotting in ports. The process of rebuilding had begun, but despite this, at the mouth of the Nile, the crews of the French giants were incomplete and less trained than the British.

In Aboukir Bay, Nelson had 13 ships of the line (each had 74 guns) and two smaller vessels, probably a frigate and a brig. The French had a similar force – 13 ships of the line and four frigates went into battle.

British ships push toward French lines
Thomas Sutherland via Wikimedia Commons

“Leave me here, in the middle of the battlefield. This is the best place for a sailor’s death!”

Both fleets clashed on August 1, just before sunset. The French commander-in-chief, François Paul de Brueys d’Aigalliers, had great respect for Nelson and carefully studied his past tactics before the battle. Not wanting to give the English a chance to encircle his forces, d’Aigalliers anchored his ships in a battle line, aiming to create a stationary wall of fire and prevent Nelson’s forces from engaging in close combat. The French were protected by a sandbank on one side, while on the other—where they expected the attack—lay the open sea.
The French commanders were convinced that the battle would not begin before sunset and would only start in the morning, so their preparations were slow and chaotic. Disorder reigned on the decks, and as it later turned out, the French ships were overloaded with supplies on the port side (left), which meant that during the battle, they could fire at the English almost exclusively from their starboard sides!

Initially, the French gunners opened fire first, while the English ships passed them, waiting for the opportunity to engage at closer range. The first ship in the English line, Goliath, anchored behind the second French ship-of-the-line, Conquérant, but during the maneuvering, she was attacked by the frigate Le Sérieuse. The devastating salvos from the 74-gun giant quickly wreaked havoc on the frigate, though it was ultimately the fire from the third ship in the line, Orion, that nearly destroyed Le Sérieuse and forced her to run aground. The following day, her crew surrendered the ship.

The first ship in the French line, Le Guerrier, defended herself against two English ships: Zealous and Theseus. In the first ten minutes of the fight, Le Guerrier lost all her masts, even though she was only being fired upon by Zealous and managed to reply with only a single broadside from her port side. Once Theseus began firing as well, the French ship quickly became a floating wreck and surrendered later in the evening, having lost more than half of her crew.

The already mentioned Goliath launched an intense bombardment on Conquérant, which had her gun ports blocked and was unable to fire for several minutes. To make matters worse, every passing English ship fired a broadside at the French vessel. Conquérant surrendered at 9:00 PM, having lost all her masts and most of her crew.

The crew of the ship-of-the-line Peuple Souverain earned a place of honor in the history of the French navy. Attacked by three English ships—Orion, Defence, and Goliath— she fiercely defended herself until 11:00 PM and surrendered only at 3:00 AM

Nelson’s flagship, Vanguard, engaged Spartiate, the third ship in the French line. Unfortunately for Vanguard, she approached from Spartiate’s starboard side—the very side where most of the French ship’s cannons and crew were concentrated. To the great surprise of the English, the French vessel inflicted heavy losses right at the start of the battle. The first broadside alone killed 35 men on the flagship, and subsequent volleys increased the casualties to 70.

French formation defends itself against Nelson’s squadron. In the rear, four French frigates are visible
Image: Nicholas Pocock, Wikimedia Commons

Nelson himself did not escape injury—he was struck by a splinter in the forehead, causing his face to be quickly covered in blood, and had to be carried below deck for treatment. Interestingly, this famous naval commander refused to announce himself at the wound treatment station and patiently waited for his turn. Vanguard fought a brutal duel with Spartiate until 11:00 PM, and it likely would have lasted even longer had the French ship’s captain not been wounded and unable to continue commanding. Despite the victory, the English flagship was so badly damaged that it had to sail to Naples for repairs immediately after the battle.

British ship of the line Minotaur, after firing broadsides at Spartiate, engaged in a duel with L’Aquilon, the fourth ship in the French line. The battle, initially evenly matched, was interrupted when the French commander, Captain Thevenard, was killed. At 8:30 PM, L’Aquilon struck her colors and surrendered.

The most frequently mentioned duel at Aboukir was the brutal battle between Bellerophon, ninth in the line, and the French flagship, the massive L’Orient. Despite the French ship’s overwhelming superiority, the English captain, Commander Henry Darby, considered it an honor to face such a giant. Within the first hour of this ferocious fight, Bellerophon suffered 43 killed, 150 wounded (including its commander), and lost two masts. The English ship was slowly turning into a wreck, and to avoid sinking, the crew cut the anchor cables, allowing the vessel to drift out of enemy gun range.

During the exchange of fire, Vice Admiral de Brueys was also wounded, suffering severe injuries to his head, arm, and hip. By the end, a cannonball tore off his leg. When he was offered the chance to leave the deck, the brave Frenchman refused. Shortly afterward, he was killed by a cannonball fired from Alexander or Swiftsure, which had approached the French flagship and set it ablaze.

At 9:00 PM, L’Orient caught fire, and an hour later, despite the crew’s desperate firefighting efforts, she exploded. In an instant, the largest ship of the French fleet ceased to exist. The blast was so powerful that burning debris rained down on nearby ships. Out of a crew of 1,010, only 60 survived. Among the dead was the ship’s commander, Commodore Casabianca, who refused to abandon the vessel, believing that his 10-year-old son, Jacques, was still below deck. As it later turned out, the boy had already escaped the ship before the explosion, but he did not survive the night.

French ship of the line Tonnant, anchored behind L’Orient, managed to escape from the attacking Majestic, but it ran aground and struck her colors on August 2. Under fire from three English ships, a total of 178 guns, the French ship of the line Franklin surrendered at 11:30 PM.


Thomas Luny via Wikimedia Commons

When the battle was already lost, Rear Admiral Villeneuve signaled the surviving ships to escape. In the end, only his flagship, Guillaume Tell, along with Généreux and two frigates, managed to flee from Aboukir. The remaining French ships were not so fortunate: Timoléon was so badly damaged that her own crew set it on fire, while Heureux and Mercure ran aground and surrendered to the English.

The battle was over. The victory of Nelson’s ships was total – with the loss of only 218 men and 677 wounded, the English captured 9 and sank 2 French ships. 1,700 Frenchmen were killed, 600 were wounded and 3,000 were taken prisoner. The few who escaped from the carnage supplied Napoleon’s army in Egypt.

After the battle

How did it happen that the French fleet was so devastatingly defeated, with practically no chance for anything beyond desperate defense?

First, this was due to the poor strategy of Admiral de Brueys, who positioned his ships too far from the shore, creating a gap that the English ships exploited. Their formation also worked against them—five French ships were unable to join the battle.
Second, the battle was fought on Nelson’s terms, as his exceptional tactical instincts allowed him to identify and exploit the enemy’s weaknesses. His plan was both bold and simple. Its successful execution was also a result of the excellent training and high morale of the English sailors.

For his victory, Nelson was awarded the title of Baron, a pension of 2,000 pounds sterling to be paid for three generations, and a coffin made from the salvaged mast of the French flagship L’Orient. The supremacy of the Empire at sea was preserved. Seven years later, at Trafalgar, the heroic admiral—one of the greatest naval commanders of all time—gave his life once again shattering the power of the French fleet.

During World War II, Germany tried to destroy Allied merchant fleet and interrupt Britain’s supply lines, seeing this as an opportunity to win the war by collapsing the opponent’s economic potential. At the beginning of 1940, Kriegsmarine’s command turned their eyes on the Dogger Bank, a place abundant in fish aggregations in the North Sea, where at that time on average 60 British fishing trawlers stayed every day.

On 19 February 1940, the German fleet decided to send six destroyers to this area to take over enemy fishing vessels and at the same time force Royal Navy to send some vessels to protect fishermen, which would scatter their forces. At the same time, Luftwaffe operated there on the same day, and as it later turned out, neither the navy nor the air forces coordinated their actions.

The Vikinger operation started on February 22 and its comic course is best described in the following points: (history below is not a joke):

  1. The German Heinkel He 111 bomber flew over the Dogger Bank for exploratory purposes. Kriegsmarine was not informed about it, so the crews of six destroyers did not know whether it was their own or the enemy. Similarly, Heinkel’s pilot was not aware of the presence of the German navy in that area.
  2. The bomber disappeared and started to observe the flotilla. At the same time, three German captains recognized the Luftwaffe machine, but another three recognized that it was the enemy and their destroyers started to fire Heinkel. The attacked pilot decided to repay himself by bombing “enemy” ships and during the second flight the destroyer “Leberecht Maass” was shot. The explosion on the midship broke through the ship, which immediately began to sink.
  3. Another flotilla ship,”Max Schultz” turned to help “Leberecht Maass”, but she hit a mine and started to sink.
  4. The other captains were sure that “Max Schultz” was attacked by an enemy submarine, so they started to drop around some depth charges, which only caused more chaos.
  5. As a result of this madness, the destroyer “Theodor Riedel” destroyed her rudder and started to swim around.
  6. In order to help the sailors of the destroyed ships, “Erich Koellner” captain ordered to send a motorboat to start rescuing people from the icy water. However, the ship itself increased its speed too fast and killed the entire motorboat’s crew.
Left: “Leberecht Maass”, right: “Max Schultz”
Source: Wikimedia Commons

Without any contact with Royal Navy (and even without contact with British fishermen) two destroyers were lost, one was seriously damaged and 590 German seamen were killed. Although it was supposed to be a piece of cake, Operation “Wikinger” was one of the greatest embarrassments of German armed forces during World War II.

The subsequent investigation revealed a lack of coordination between Kriegsmarine and the Luftwaffe. The official guilty party was declared Heinkel pilot, and despite the development of procedures for the future, commanding the joint actions of the German navy and air forces was far from perfect by the end of the war.


They were unique not just for their abilities, high morale and killer weapons, but also because of how frightening, proud and beautiful they looked on the field of battle. Lets take a precise look at what it is that made the winged hussars such legendary warrios.

Weapons and armor

The most dangerous weapon of the Hussar was undoubtedly his lance. A long weapon, reaching anywhere from 5 to 7 meters in length, was an incredibly destructive and effective weapon used for charges – a Lithuanian Hussar once killed six musketeers in one thrust. The size of the hussar’s lance gave the rider the advantage of coverage over the pikemen, who would use the 3-meter pikes; enabling the Poles to reach them first. After crushing the lance, the riders reached for the long sword called “koncerz” that was not used for fencing, but instead for pushing opponents. This sword was generally good at eliminating armored adversaries; giving the hussars a total advantage over the enemy. When there was a need for fencing, they used a Hussar saber. Today, the hussar saber is considered to be a world-class achievement which Wojciech Zabłocki (Polish fencer, world champion and Olympic medalist) has dubbed “the best fighting sword in human history”.

Wojciech Kossak – Battle of Kircholm
Source: commons.wikimedia.org

The hussar’s torso was protected by a breastplate typically 3-4 mm thick on the front and up to 1 mm thick on the sides. Each of such breastplates had to pass a so-called “fire test” – before the first use it had to withstand a close shot from the gun. Initially, the backplates were used as back protection, but in the later period of the Hussars’ existence, they were abandoned  and changed to leather belts dragged on their backs. Animal leathers (leopard’s or tiger’s) were also used, which were not only menacing and prideful, but also able to effectively protect the warrior from back cuts.

The armor was complemented by a helmet with a moving nose shield and a cushion protecting the forearms. The whole kit was able to weigh anywhere from 14-15 kg (up to 33 pounds); still less than the equipment of a modern soldier on the battlefield.

Unfortunately, the hussars never used the characteristic double wings attached to the armor. Instead, some of them used a straight, one wing attachment on the saddle’s bow into which the eagles or the vulture’s feathers were inserted. Although there is a theory about the protective properties of such wings (for example, against Tatar’s rider’s lasso), Polish husaria likely used them for ornamental purposes only.

Hussar horse

The exhibition of the entire hussar fellowship, which included the equipment of the hussar and his asisstants, was an extremely expensive endeavor – it was the equivalent of buying an entire village. Of all of this, the hussar horse was always the most valuable, because the combat potential of the rider and the entire unit was determined by the strength and endurance of the horse.

The horses of husaria were recruited from the eastern races, such as Turkmenistan or Persia. These breeds, despite being small, stood out with enormous endurance and speed. They had to have an intense training routine, which aimed to shape their condition, obedience and courage on the battlefield. One of the components of the workout was, for example, turning exercises – the horse had to accelerate 25 meters, turn around quickly, run 25 meters, turn again, etc. In addition to endurance, it had to have the ability to maneuver quickly within a squad. The price of one steed was up to 200 polish złotys at the time, which is 60 kg (over 132 pounds) of silver! The theft of such a horse abroad was punishable by death in the Commonwealth.

Polish Hussar in full armor during the battle
Author: Mariusza Kozika

Hussars often put the good of their horses above their own – when the army lacked food they often preferred to feed them instead of themselves. Sadly, these horses often paid the highest price for Poland’s freedom. While a Hussars’ mortality rate was on average 3-5% in most battles, the  horses reached 30%. Most riders had to have several mounts at once.

It is worth mentioning that among the enemies of the Commonwealth, a myth would circulate stating that the hussars had immortal horses. This was due to the ability of the horse to keep driving forward towards the enemy despite being severely wounded in the front torso. The result of such a phenomenon was due to muscle memory and physiology. The horse was still pumping blood through the arteries and could sustain movement for a few seconds, completing its primary task of demoliting and dispersing the defenses of the enemy.

Hussar morale and iron discipline

Husaria’s strength was not only the devastating charge, armament and armor, but above all the high morale and the insatiable courage of the warriors serving in this elite formation.

In 1694, during the Polish-Turkish war in the Battle of Hodow, 400 Hussars and medium cavalrymen (Polish: jazda pancerna) were forced to resist 10,000 Tatars (some sources even speak of 40,000 enemies). Since the opponent was too numerous to burden them, the riders took refuge between the buildings of the surrounding village and, after leaving the horses, began defending. The impact lasted 5-6 hours; when the Poles ran out of ammunition, they fired at their opponents by putting their own arrows into pistols. In all, the Tatars suffered heavy losses, with the losses among the Polish defenders averaging around  30 killed (another 30 killed after the battle). This example reflects the knightly spirit in which the Polish riders were raised into. Honor, bravery, and sacrafice for the homeland were valued the most amongst the Polish Husaria. They would often say: “Let the sky fall and we will hold it up with our lances”.

Wojciech Kossak – Husaria
Źródło: commons.wikimedia.org

Devastating charge

The hussar banner (usually 200 riders) was most often commanded by a lieutenant who issued orders using a high-pitched pipe. The charge went as follows:

  • The banner is set in two rows, about 350-400 meters facing the opponent. The distance between the riders was about 4 meters.
  • Riders slowly passed the first 50-60 meters. Lances were lifted up.
  • During next 150 meters Hussars increased their speed to trot.
  • 150 meters in front of the opponent, the lances were lowered to combat position and the trot went into a gallop. Two Hussar ranks merged into one and a rider’s rider’s compartment was established with minimum distance between the riders. Mostly then, the first salvo of the enemy followed, with virtually no effect.
  • At 50-60 m before the enemy line, the horses were running galop (the maximum speed was 60km / h – approx. 40 miles/h). With a loud cry “Mother of God!”, or “Jesus Mary!” The Winged Hussars hammered into the ranks of the enemy.

Usually, the attack caused complete destruction of the opponent’s forces, and no military formation of that period was able to effectively resist the Polish Hussar charge. For this reason, some armies did not even try to confront them face to face. An example of this is the Polish-Swedish Battle of Gniew (Battle of the Vase), when Swedish King Gustav Adolf simply did not want to fight the Husaria in open territory and ordered the troops to stay in their trenches. It is said that one of the Hussars in the front of the Polish formation went forward and shouted in the direction of the opponent saying: “If you are not a motherfucker then go out into the field!” – Unfortunately, that did not work.

Husaria’s charge at Kircholm
Author: Mariusz Kozik

Adaptation tactics to the opponent

Winged Hussars have always modified their combat tactics based on the opponent with which they were to measure up to. For example, when fighting the Tatars, they often left their lances behind and  were more likely to use firearms – Tatars were a fast-paced, but poorly armored cavalry, so they were prone to fire pistols. On the other hand, when the Hussars fought with the Swedish army (which comprised mostly of infantry), the lances were their primary weapon. This would allow the Polish riders to use the maximum power of their destructive charge.

As you may have guessed, other countries have also tried to create their own formations that would mimic the style of the Polish Hussars. Outside of the common roots of the Polish and Hungarian Hussars – which differed in only one area and that was that the Poles created heavy cavalry – Winged Hussars – and the Hungarians made light cavalry formations, the Huzars.

The Russians were one of the first to try to create their own formation of the cavalry following the invincible Husaria. The wings themselves were not enough, and they made a few mistakes while training and arming these soldiers; Among other things, it was forgotten that the lances had to be empty inside, which made them too heavy and totally useless during the battle. The Poles were also heard of in France and King Louis XIV wanted to see Polish horsemen at his court. When they arrived in France, the king gave them a “combat” test  by ordering the Poles to dance on their horses backs. Of course this didn’t go over so well as this was not a battle they were suited for.

Polish Hussars’ greatest victories

  • Battle of Cutrea de Arges (25.11.1600) – Polish army of 1,450, including 950 Hussars, defeated more than 7,000 soldiers of Wallachia.
  • Battle of Kircholm (27.09.1605) – Army of the Grand Duchy of Lithuania in the number of 3,750 men (1750 Hussars), under the command of the Field Hetman Jan Karol Chodkiewicz completely destroyed the Swedish army of King Charles IX three times total. During this battle, the hussars charged several times into the enemy infantry and cavalry. Under Kircholm, the Swedes lost 90% of the infantry that participated in the battle.
  • Battle of Kłuszyn (04.07.1610) – The crushing victory of the Polish army in the strength of 6800 people (including about 5600 Hussars) commanded by the hetman of the Polish crown Stanislaw Żółkiewski against 35 000 Russians and hired foreigners. The size of the enemy made some hussar banners have to charge the enemy even 8-10 times. The battle opened the way for Poles to Moscow, where Polish prince Władysław became the tsar.
  • Battle of Chocim (07.09.1621) – During this battle over 600 Polish-Lithuanian riders (520-560 Hussars) under the command of Lithuanian hetman Jan Karol Chodkiewicz smashed 10,000 Turkish troops and infantry. Desperate defense of Chocim ended the Polish-Turkish war and became the foundation of a peace treaty for the Crown.
  • Battle of Kutyszcze village (26.09.1660) – Two incomplete Hussar banners of the Polish forces operating in Ukraine, caught up with Russian retreating Ukainian army under Vasyl Szeremietiew. 140 Polish horsemen devastated 3500 cavalry and Cossack infantry, gaining an enemy stock. In this encounter Hussars did not suffer any losses. Even with with the Russians counting 25: 1.
  • Battle of Vienna (12.09.1683) – Hussars’s charge of Polish king Jan III Sobieski broke the siege of Vienna and forced the Turkish army to retreat. In this battle and also under the Parkans, the power of the Ottomans was broken and the threat posed by Islam to Christian Europe was removed. When the Husaria attacked, descending from a steep slope into the army of the vizier, allied with the Poles, the German and Austrian troops held their offensive to watch the powerful and beautiful charge of the Poles.
  • Battle of Hodów (11.06.1694) – Battle also known as Polish Thermopylae. A clash where 400 hussars and medium cavalrymen successfully repelled the attack of about 40,000 Tatars and forced the enemy to retreat.
Below the video from the reconstruction of the Husaria charge to the positions of the Swedish musketeers. Please pay attention to the great replica of the armor and weapons of the riders, including the famous wings.

Many thanks to Mariusz Kozik for permission to use his graphics in this article.

PzKpfw. Tiger II possessed immense firepower and solid armor – no Allied tank of that period (excluding the Russian IS-2) could penetrate the frontal armor of the German colossus. The phenomenal 88mm gun offered a range of up to 4 km and 100% accuracy up to 3 km, which gave the “Königstiger” an advantage over Allied machines. However, it should be noted that the Tiger II was highly prone to breakdowns, had a weak and fuel-consuming engine, and its production was very expensive. Towards the end of the war, these tanks participated in numerous engagements on both fronts but were often eliminated from combat due to malfunctions, supply shortages, or tactical errors by commanders. Despite these challenges, operational specimens were such dominant weapons on the battlefield that the Königstiger became one of the icons of armored warfare in World War II.

The Tiger II was designed to replace the highly successful PzKpfw. VI Tiger tank and, with its capabilities, neutralize the numerical advantage of Allied armored forces, especially on the Eastern Front. Two projects competed in the tender for a new heavy tank for the German army – one by Henschel and the other by Ferdinand Porsche. Ultimately, the Henschel solution was chosen, and after quick testing, mass production of the vehicle began in January 1944, during the final phase of the war.

The new tank was named Königstiger, meaning the Bengal Tiger in German (often mistakenly, literally translated as the Royal Tiger).

Tiger II at Bovington Museum
Source: Hohum, via Wikimedia Commons

With the vast expanses of the Eastern Front in mind, which were supposed to be a kingdom for the Tiger II, the focus during the tank’s development was on firepower and durable armor. The German armored colossus was equipped with the 8.8 cm KwK 43 L/71 gun, an elongated version of the 8.8 cm gun known from the Tiger tank – a gun considered the best during World War II. It was characterized by excellent accuracy and tremendous firepower. The Königstiger had no equal in this field – from a distance of up to 3 km, it could penetrate virtually any enemy tank while being able to fire 9 rounds in just 35 seconds.

Externally, the Tiger II had a silhouette resembling that of the Panther. The most vulnerable areas to enemy fire were significantly thickened and sloped, designed to facilitate ricocheting of projectiles. The front armor plate, which was sloped at a 50-degree angle and had a thickness of up to 180 mm, was never penetrated during combat! However, it should be noted that although projectiles did not penetrate the tank’s armor, the interior of the vehicle experienced spalling and cracks, which posed a significant danger to the crew. This weaker steel composition was a result of Germany’s loss of access to sources of molybdenum, and its replacement with vanadium, which proved to be a serious mistake.

One of the preserved Tiger II tanks, photo from 2008
Source: Huhu via Wikimedia Commons

The Tiger II weighed almost 70 tons and this enormous weight made it too heavy to cross many European bridges without first strengthening them. The tank was equipped with a 690-horsepower Maybach engine, which was already used in the Panther at the time, but it was too weak for a tank as big as the Königstiger. In addition, the unit had an incredibly high fuel consumption (500 liters per 100 km with an 860-litre tank) and refueling the vehicle was a real challenge for the waning Third Reich. For this reason, and also because of supply problems, it happened that crews were forced to abandon their machines during the fighting. The problem was that they were so heavy and huge tanks that only another Tiger could tow a damaged Tiger II.

The new tanks were first used in combat on July 18, 1944, in Normandy against British forces. Two of them were quickly destroyed, and one – the command vehicle – fell into a bomb crater and got stuck. This was the first Tiger II captured by the Allies.


An immobilized and abandoned Tiger II in Stavelot, Belgium in December 1944. 
Source: US Army via Wikimedia Commons

In English: A few months later, the Tiger II tanks were part of the German armored fist during the Ardennes offensive, and although their losses were significant, they were more due to supply shortages and difficult weather conditions rather than enemy fire. The vehicles themselves performed well, as thanks to their firepower and thick armor, they could brutally force their way through the Allies’ defensive lines. The Allies had to mostly use anti-tank mines, bombs, and bazookas to immobilize Hitler’s armored monsters, as few guns could penetrate the armor of the Königstiger.

Ultimately, on the Western Front, the Königstiger tanks were stopped by mechanical failures, gaps in crew training, the use of 250-500 kg bombs by the Allies (after which the massive tanks could end up as in the photo below), as well as by the RAF’s Hawker Typhoon fighter-bombers, known as “tank hunters”.

General Dwight D. Eisenhower inspecting a destroyed Tiger II tank in France
Source: Acme News Photos, Public domain

On the Eastern Front, the Tiger II did not have a successful start of combat operations. On August 12, 1944, near the village of Oględów, three new German tanks were destroyed during an ambush conducted by a single T-34/85 and infantry platoon (the tank commander, Aleksandr Oskin, was awarded the Gold Star of the Hero of the Soviet Union for this action). During fighting in that area, the Germans lost 14 more Tiger IIs, mostly in ambushes using IS-2 tanks and ISU-122 guns.

However, shortly afterwards, in October 1944, the Tiger IIs from the 503rd Heavy Panzer Battalion participated in Operation Panzerfaust, the pacification of Hungary. During 166 days of fighting in Hungary, these vehicles destroyed at least 121 Soviet tanks, 244 guns and artillery pieces, five airplanes, and one train. The losses amounted to 25 machines – 10 of them were lost in combat with the Soviets, 2 were sent for repairs, and 13 were destroyed by their own crews – due to malfunctions or supply shortages.

The Americans, after inspecting the captured Königstigers, stated that they completely did not understand the reasons that guided the German command during the design of these monsters. The Tiger II was too heavy for its engine, too large, and too slow (in the Ardennes, they could block entire roads and thus delay their own forces’ offensive). Additionally, the unit cost of producing one vehicle was astronomically high – the cost of producing one Tiger II was equivalent to the cost of ten T-34s (in conversion: $320,000 versus $31,000 for one tank).

The crew of a Panzer VI “Königstiger” tank in Budapest, 1944.
Source: Das Bundesarchiv via Wikimedia Commons

Did the Königstiger deserve the title of the most powerful tank of World War II? Fully fueled, functional units driven by trained crews could truly dominate the battlefield, especially on the Eastern Front, where vast spaces gave the Tiger II an advantage over enemy tanks. Towards the end of the war, the last giant of the Panzerwaffe could really have only two worthy competitors: the American M-26 Pershing and the Soviet IS-2. The slightly lighter (46 tons) and less heavily armored Pershing would probably have to give way to the Tiger II, but the case with the IS-2 was not so simple. Stalin’s latest tank, equipped with a 120mm gun, theoretically had the ability to penetrate the armor of the German colossus from a shorter distance. In turn, the Königstiger with its terrifying, sniper-like 88mm gun, could keep everyone, including the IS-2, at a distance and perhaps destroy it before it could fire a shot. Regardless, the 492 PzKpfw. Tiger II “Königstiger” tanks produced by the Third Reich were too few in number compared to nearly 4,000 IS-2s produced; however, if World War II had lasted longer, the German monster would have had a chance to confront the British Centurion – one of the most successful tanks of the 20th century.

Original recordings of the Tiger II tank from 1944-1945 (at 0:38 in the video you can see Kurt Knispel, the German armored ace):

The world’s only remaining operational Tiger II during a ride in 2015:

The same tank in Overloon, Netherlands in 2018:

The German occupation of Warsaw during World War II is a history marked by mass executions, repressions targeting civilians, deportations to extermination camps, as well as widespread hunger and humiliations inflicted by the armed forces and officials of the Third Reich. The most ruthless enemies of the Polish nation were the Gestapo officers conducting investigations in the capital, who relentlessly and brutally hunted down priests, representatives of the Polish intelligentsia, entrepreneurs, and politicians, and later members of the armed resistance movement – the Home Army.

Pawiak prisoners hanged by Germans in February 1944
Illustration from the book “Warszawa 1945-1970”, Wikimedia Commons

The Polish resistance movement did not fall behind the Germans. Throughout history, there were daring execution actions carried out by the Armia Krajowa (Home Army) units, such as the killing of Franz Kutschera – the SS and police leader of the Warsaw District in the General Government, a criminal known as the “Butcher of Warsaw.” On February 1, 1944, members of the special AK unit “Pegaz” successfully executed the hated SS officer in the center of Warsaw.

In this article, we wanted to address a similar action that took place earlier, on October 1, 1943. The target of the sabotage units of the Home Army (Armia Krajowa) was Gestapo officer Ernst Weffels, the head of the women’s prison in Pawiak (a German political prison in Warsaw). Weffels was known for his brutal and sadistic treatment of prisoners, but this fact was not the direct reason for the assassination attempt on his life. The denunciation of one of the imprisoned women there led the German officer very close to discovering the method of smuggling correspondence between the Polish underground and the Pawiak prisoners. Once he became aware that this was being done with the assistance of Polish hospital personnel within the prison, the Home Army command decided to take action and issued an order to kill the cruel Gestapo officer.

The inscription “We will avenge Pawiak” was made in occupied Warsaw in June 1943
Władysław Bartoszewski via Wikimedia Commons

The task of eliminating Weffels was undertaken by members of the Home Army unit “Agat” (later renamed “Pegaz” – it was they who, a few months later, also killed Franz Kutschera). These individuals were referred to as “anti-Gestapo.” They were trained to carry out assassinations of officers like Weffels, who were known for their exceptional cruelty while occupying the German-occupied capital.

The entire operation had to start with tracking and understanding Weffels’ daily schedule. The intelligence of the Home Army was involved in this task, which faced a challenging situation since the Germans were aware of the existence of the Polish underground state and exercised considerable caution. It was common practice among the officers of the secret police in occupied Warsaw to limit their presence in public spaces (they were transported to work) and to avoid revealing their identities, even their faces. The Gestapo agents stationed in the city had personal guards assigned to them. These precautionary measures were a result of previous assassination attempts on German war criminals, making it increasingly difficult for Poles to carry out attacks on their lives

The Home Army managed to locate Weffels. His reconnaissance was carried out by Captain Aleksander Kunicki, a Polish veteran of World War I, the Polish-Bolshevik War of 1920, and the Third Silesian Uprising. During World War II, he was a member of the Polish underground resistance. Kunicki had previously been involved in monitoring Germans working at Pawiak Prison and knew that the Gestapo officers there worked 24 hours and then had a day off. They were transported to work from Szucha Avenue, and it was during his daily observation that Kunicki identified a German who matched the description and reported that it was likely Ernst Weffels. Eventually, his identity was confirmed by a former inmate of Pawiak Prison some time later.

Members of the “Parasol” Battalion during the Warsaw Uprising. In the center stands the participant of the “Weffels” operation, Maria Stypułkowska-Chojecka, codenamed “Kama”
Source: “Antoni Przygoński, Powstanie Warszawskie w sierpniu 1944 r”.

The command of the 5-person liquidation team was entrusted to Kazimierz Kardas, codenamed “Orkan.” The operation was planned for October 1, 1943, and the execution of the sentence was to take place on August 6, near the main Gestapo building at the corner of Koszykowa and 6 Sierpnia streets in Warsaw. The briefing was held at Orkan’s apartment at 9:00 a.m. His team members began leaving the apartment individually at 11:00 a.m., and at 11:40 a.m., the distribution of weapons took place in Ujazdowski Park. The participants of the operation took their designated positions.

Ernst Weffels left his house at 12:02. Two minutes later, his identity was confirmed through pre-established gestures by two individuals from the Polish unit. Orkan quickly closed in on him and fired several accurate shots at the German from close range, but Weffels did not fall and began to flee towards Ujazdowski Park. Kardaś fired a few more times, but his magazine ran out. At the same time, the Polish cover team engaged in a battle with several German soldiers who had arrived upon hearing the shots. A police officer also appeared at the entrance to the park, but fled when Orkan aimed an empty pistol at him.

Kazimierz Kardaś ps. “Orkan”
Źrodło: Akcje zbrojne podziemnej Warszawy 1939-1944 via Wikimedia Commons

Kardaś changed the magazine and moved away to locate Weffels. He found the wounded and bloodied Gestapo officer near one of the benches in the park and without hesitation, shot him in the head and retrieved the documents. The entire unit, still engaging incoming Germans with gunfire, got into the car and swiftly drove away. The rest of the escape proceeded without disruptions.

While not widely discussed, the “Weffels” operation was one of the most spectacular actions undertaken by the AK (Home Army) executioners during World War II. Its planning and execution were impeccable, as the intended objective was successfully achieved. The operation itself was swift and carried out without any own casualties, which was exceptionally rare. Typically, in similar assassination operations, members of the armed wing of the Polish underground state often suffered losses.

The execution of Ernst Weffels was a true shock for the Germans. The Home Army unit proved that in the capital, Poles could reach any of the occupiers, and none of them could feel safe. The spectacular operation also boosted the morale of both Home Army members and Warsaw civilians.

The subsequent fate of selected heroes from the “Weffels” operation:

  • Kazimierz Kardaś, codenamed “Orkan,” died from injuries on May 6, 1944, after being seriously wounded during the “Stamm” operation.
  • Aleksander Kunicki, codenamed “Rayski,” survived the war. In 1945, he was arrested by communist authorities and sentenced to death. Ultimately cleared of charges, he published a book about his wartime memories in 1968. He passed away in 1986.
  • Maria Stypułkowska-Chojecka, codenamed “Kama,” was one of the individuals during the “Weffels” operation who conducted target reconnaissance and ultimately confirmed the identity of the German just moments before his death. She also participated in the Warsaw Uprising and passed away in 2016.
  • Ernst Weffels’ lover, Sabina Bykowska, was shot and killed on October 5, 1943. Prior to her death, Bykowska had assisted Weffels in infiltrating and gathering intelligence on members of the Polish underground at Pawiak prison.
“Poland Fighting”

On December 7,1941, Japan attacked Pearl Harbor – the American naval base in Hawaii. Three waves of Japanese planes – fighters, bombers and torpedo planes – destroyed five of the eight American battleships (damaged other three) and sunk eleven other large ships. Of the 390 aircraft stationed on the island, as many as 198 were destroyed. Losses in people amounted to 2403 deaths (almost half of them were sailors on the USS Arizona battleship) and 1178 were wounded. The Japanese squadron of Admiral Nagumo captured the victory with very small losses: over Pearl Harbor the Americans shot down 29 enemy aircraft and sunk 5 miniature submarines.

Shortly after this bold attack, the command of the American Pacific Fleet, focusing on the terrible balance of losses, horribly described Pearl Harbor as a humiliating disaster. A similar, exaggerated tone was quickly picked up by the media and quickly after shockingly unreliable articles started to appear, even saying that the “loss of 3/4th of the American fleet” – which was, of course, nonsense. Probably that is why, in public opinion, the myth is still circulating today that the attack on Pearl Harbor was a huge defeat for the USA, from which the Pacific Fleet could not recover anymore.

US Navy burning ships during attack on Pearl Harbor; from left: USS West Virginia, USS Tennessee and USS Arizona.
Source: US Navy via Wikimedia Commons

One of the first commanders who showed a reasonable calculation of losses was Rear Admiral Chester Nimitz, who arrived at Pearl Harbor on December 24, 1941. Nimitz did not miss the fact that the roadstead in Pearl Harbor is not deep and the Americans managed to lift most of the ships settled there. In the end, only three (out of eighty two) of them – Arizona, Oklahoma and Utah – were irretrievably lost.. All three of them were relatively old (encoded before or during World War I) and slow, so their loss was not acute to the US Navy. The proximity of hospitals has reduced (and so much) the loss of human lives.

Despite appearances, the fact that Japan attacked Pearl Harbor with surprise when the ships were at port turned out to be beneficial for the US. According to Nimitz, if the Pacific Fleet had gone to the sea to meet the enemy, its loss would be not 3,800 but 38,000 people. These facts represent a “catastrophe” in Pearl Harbor in a completely different light from what was previously thought.

Also, the Japanese leadership did not share the euphoria that prevailed in their country after the victory in Hawaii. The plan of the attack was to completely destroy the enemy fleet (the Japanese fleet did that 36 years ago under Tsushima against the Russians) and then in six months were going to take over British Malaysia, the Philippines, Dutch East Indies, Burma, New Guinea and even Australia. Meanwhile, as we already know, the American losses were not so big at all and, most importantly, the Japanese did not manage to destroy their main purpose – the three aircraft carriers: USS Lexington at that time was delivering aircraft to Midway, USS Enterprise to the island of Wake, and USS Saratoga was undergoing maintenance work in San Diego.

Second wave of Japanese airplanes taking off from the Akagi aircraft carrier
Source: Wikimedia Commons

In addition, Pearl Harbor revealed the chaos and indecisiveness that prevailed in the Imperial Fleet at that time. Two commanders, Genda and Yamamamoto, had different visions of the main goals of the future attack. The first one wanted to attack battleships first of all, while the second wanted to attack aircraft carriers. Another example is the situation when, before the air raid on the American base, Japanese people noticed that one of their aircraft carriers would not reach their destination due to insufficient reach. First, it was ordered to abandon the carrier at sea, but later Japanese decided to load additional barrels of oil on the ship.

There were more and more errors committed by the Emperor’s fleet, among them:

  • sending out a second wave of 250 kg bombs, which were unlikely to cause serious damage to the battleships they targeted,
  • The 800-kilograms of bombs loaded on diving bombers were too heavy for airplanes, which had an impact on their accuracy: out of 49 dropped bombs, there were 10 which managed to hit the target, but only 4 of them exploded.

The consequences of the attack on Pearl Harbor were terrible for Japan. Already on April 18,1942, American bombers raided Tokyo successfully and a Japanese offensive directed to Australia was halted in May. On June 7th, the tragic Battle of Midway ended for Japan, where the Imperial fleet lost four aircraft carriers.

Despite everything, no matter how much the Pacific Fleet suffered during the Pearl Harbor defeat, since the beginning of the war the Imperial Republic of Japan had been doomed to failure. The Japanese economy was not even able to approach US production capacity: in 1940, the Americans produced four times more aluminium and 518 times more oil than Japan. In the same year alone, the Congress commissioned eighteen large aircraft carriers, seven battleships, seven battlecruisers, twenty-seven cruisers and fifteen thousand planes for the armed forces. The unleashing of the war with the USA was best summed up by the already mentioned admiral Isoroku Yamamoto, who after the attack on Pearl Harbor said: “I am afraid that all we have done is to awaken the sleeping giant and fill it with terrible determination”.

What happened later is history. The Japanese Empire was destroyed when two American nuclear bombs fell on Hiroshima and Nagasaki, and the Soviet Union threw itself at its remains. All this started with a spectacular but ineffective attack on Pearl Harbor’s base.

Below I have pasted a fragment of a very good film “Isoroku” showing the Japanese attack on Pearl Harbor:

a moment from the same film, explaining the war strategy of Japan and the motives that led the Combined Fleet Command to attack the USA: (from 6:53)

On November 15, 1938, Matome Ugaki was promoted to the rank of Rear Admiral in the Imperial Japanese Navy. This ambitious officer, who hailed from a poor Japanese family with samurai traditions, quickly climbed the ranks of his career. Interestingly, however, he was not an exceptional strategist. His approach to warfare was an extension of samurai tradition, and the Rear Admiral himself failed to grasp the significance of modern weapons, such as aircraft carriers. Ugaki was one of those who mentally remained in the early 20th century, a time when Japan had humiliated Russia at sea. He championed the idea of large battleships, which he believed would continue to form the backbone of the Imperial Navy for a long time.

Matome Ugaki in 1938/1939
Wikimedia Commons

Subordinates nicknamed Ugaki the “Golden Mask” because he never smiled. However, he commanded respect through his diligence, conscientiousness, and zeal in carrying out orders. The less important fact was that, to put it bluntly, he was an average commander.

When Japan entered World War II, Ugaki was appointed Chief of Staff of the Combined Fleet under the famous Admiral Isoroku Yamamoto, the architect of the attack on Pearl Harbor. It turned out that Yamamoto could not stand his new subordinate, as he quickly recognized the aforementioned traits in him. Additionally, the admiral referred to Matome Ugaki as a “drunkard” and this was not an unfounded insult. Ugaki considered proficiency in drinking alcohol one of the qualities of a good samurai and was fond of sake. At the same time, he was known for his so-called “strong tolerance.” One noteworthy example is the Japanese custom of kampai—the tradition of pouring and drinking sake together. When a participant had enough, it was considered polite to decline further drinks. Matome Ugaki was known for never refusing another cup of sake, even when, at some gatherings, he was served dozens of cups. Remarkably, he showed no signs of intoxication and would leave such events with a steady gait.

Yamamoto’s lack of trust in Ugaki was evident, among other things, in the fact that the samurai had no involvement in the attack on Pearl Harbor and only learned about it upon returning to duty from a short leave. By that time, Ugaki was already impressed by the suicidal attacks on American ships—specifically the use of miniature submarines during the offensive on Hawaii.

As Chief of Staff, Ugaki harbored a deep disdain for Americans, which at times bordered on irrationality. A striking example of this was the story of the American aircraft carrier Saratoga. During the war, Saratoga was damaged twice—first by the submarine I-6, after which it underwent six months of repairs, and then hit again by I-26 after returning to battle. A somewhat perplexed Ugaki hastily declared that Saratoga had been sunk the first time and claimed that Americans were producing new ships with the same names to replace destroyed ones—a notion that was, of course, absurd.

Matome Ugaki (top) and Isoroku Yamamoto (bottom), 1941
Wikimedia Commons

As the Pacific War progressed, Yamamoto and Ugaki found common ground in the idea of engaging the Americans in a decisive battle that would destroy their fleet. The chosen location for this plan was Midway Atoll. However, as we know, the battle’s outcome was disastrous for Japan, with the Imperial Navy losing four aircraft carriers.

Things did not go any better for the Japanese at Guadalcanal, where, after fierce fighting, the Americans ultimately secured control of the island. Ugaki openly blamed the ground forces for the defeat.

In November 1942, Matome Ugaki was promoted to the rank of Vice Admiral in the Imperial Fleet. This was during a time when the air offensive planned by him and Yamamoto turned out to be a complete failure. Vice Admiral Ugaki accused his subordinate officers of cowardice, claiming they commanded from positions too far from their troops. As a result, both Ugaki and Yamamoto began personally visiting frontline units. In April, news of their planned visit was intercepted by the Americans, who prepared an ambush for the two Mitsubishi G4M bombers and their six fighter escorts that formed the air convoy for the Japanese commanders. Sixteen P-38 fighters launched a brutal attack, focusing their fire on Yamamoto’s aircraft. The admiral’s plane attempted to evade the American pilots with a steep dive. Following behind was the second bomber carrying Ugaki, but the older aircraft began to shake, risking structural failure. The pilot reduced speed, only to be berated by the vice admiral, who ordered him to chase the commander’s plane at all costs. It was already too late, as Yamamoto’s bomber had crashed into the jungle, killing everyone on board, including the most brilliant strategist in the history of the Japanese Navy. Ugaki’s aircraft was also shot down, crashing into the sea. However, the vice admiral was fortunate to be thrown from the plane before it sank. Upon reaching land, he learned he was one of only three survivors of the attack.

The twin super-battleships Musashi and Yamato, early 1943.
Takeo Kanda via Wikimedia Commons

Matome Ugaki mourned Yamamoto’s death in the same way a feudal rōnin grieved the loss of his lord. Like a rōnin, he also wished to die in battle and erase the shame he felt for surviving the engagement in which Isoroku Yamamoto was killed. After recovering from his injuries, Ugaki was quickly appointed commander of the 1st Battleship Division, which included the super-battleships Yamato and Musashi—the largest and heaviest battleships in history. In June 1944, Ugaki participated in the Battle of the Philippine Sea, where the Americans achieved a crushing victory over the Japanese fleet, inflicting enormous losses and effectively annihilating Japan’s naval aviation. Devastated, the vice admiral returned to Japan, where he indulged in drinking and revelry in the company of geishas.

Later, during the Battle of Leyte Gulf, Ugaki, commanding from the deck of the Yamato, witnessed the sinking of several ships by the Americans, including the Musashi, the Maya, and the flagship Atago. When Admiral Takeo Kurita, seeing the scale of the losses and the lack of hope for victory, ordered a retreat, Matome Ugaki viewed this as being deprived of the chance for a glorious death worthy of a samurai. He was transferred to the staff in Tokyo, and was subsequently tasked with organizing kamikaze units on Kyushu. It is said that during the nomination, the vice admiral, commander of the 5th Air Fleet, was drunk.

Preparing Mitsubishi A6M Reisen aircraft for a kamikaze suicide attack, 1945.
Wikimedia Commons

The actions of kamikaze pilots during World War II were covered in detail in a recent article. Suffice it to say that although the initial “divine wind” missions were unsuccessful, during the American invasion of Okinawa, 1,800 aircraft sent by Ugaki inflicted significant losses on the US Navy (218 American ships were damaged, and 36 were sunk). The vice admiral was prepared to send even more kamikaze into battle, but his plans would never come to fruition.

The end of World War II had come for the Empire of Japan. On August 15, 1945, Emperor Hirohito’s speech was broadcast over the radio, informing the nation of the necessity to accept the Potsdam Declaration, effectively signaling Japan’s surrender. Vice Admiral Matome Ugaki calmly listened to the broadcast and then made the final entry in his diary. In it, he took responsibility for the failures of the kamikaze pilots, who, with heroic courage, had tried to stop the enemy from reaching Japan’s doorstep. Ugaki noted that he had not yet received an official order to cease hostilities, so, in accordance with the spirit of Bushidō, he decided to die as a true samurai by carrying out a suicide attack on American warships.

The last photograph of Vice Admiral Matome Ugaki, taken before his suicide mission on August 15, 1945.
Chiran Kamikaze Peace Museum via Wikimedia Commons

Ugaki removed the insignias and decorations from his uniform, leaving only the ceremonial tantō short sword gifted to him by Admiral Yamamoto. He requested his final photographs to be taken, then took his place aboard his Yokosuka D4Y dive bomber, saluting his comrades before departure. Despite protests from some pilots, who argued that the vice admiral’s sacrifice was a futile waste of lives and equipment, 10 other aircraft and 22 individuals joined Ugaki on the mission (his bomber carried a crew of three). After takeoff, three planes immediately returned to base, citing “engine troubles,” though it was likely their crews had chosen to abandon the suicide mission.

His final message was transmitted on August 15 at 7:24 PM, reporting the beginning of a dive toward an American landing ship. Gunfire from the enemy vessel brought Vice Admiral Ugaki the honorable death he had long sought, fitting for a Japanese samurai. The sea later carried the body of the last kamikaze pilot—stripped of insignias but still bearing his sword—to the shores of Iheyajima Island.

One of the most intriguing plans to assassinate Adolf Hitler was the British Operation Foxley, which was declassified only about 50 years after the end of the war. The British Special Operations Executive (SOE) developed a concept in 1944 to kill the leader of the Third Reich at his Berghof residence located in the Salzburg Alps near Berchtesgaden, Germany. The Allies knew from prisoner accounts, spies, and radio intercepts that Hitler spent a lot of time there, feeling safe and sometimes ignoring his security protocols. Hitler claimed that Berghof reminded him of his childhood in Austria and that he could relax there and think freely. It was also where he made some of the most important strategic decisions during the war, including the attack on the Soviet Union.

Kehlsteinhaus, Hitler’s teahouse belonging to the Berghof complex
Source: Cezary p via Wikipedia

The British intelligence knew the details of his life at the residence, his preferences, and the specifics of his security. They knew his daily schedule and meal times. Hitler went to bed late, around 4 in the morning, and had dinner at 10 pm. He didn’t wake up early – even at 10 in the morning, and he walked to the Mooslahnerkopf tea room for breakfast, which took him 15-20 minutes. The most important thing was that Hitler walked there alone, and the presence of a guard annoyed him greatly. If he saw a guard patrolling the road during a walk at Berghof, he would yell at him, “If you’re afraid, go and guard yourself!”

Despite Hitler’s disregard for his own security protocols, it must be admitted that the Berghof residence itself was well-protected.
Within the building there were located barracks of SS Leibstandarte, Hitler’s personal guard, which consisted only of carefully selected and well-trained volunteers. The living space at Berghof was guarded by his eight-man elite security unit – the SS Begleit-Kommando – who slept in the same building on the same floor as their leader.

The Leibstandarte SS Adolf Hitlerparades in Berlin, 1938
Bundesarchiv via Wikimedia Commons

British intelligence, however, found weaknesses in this solid German security system. Among other things, they noticed that every time Hitler arrived at Berghof, his people raised a large flag on the mast that symbolized the presence of the German Chancellor. However, they mainly focused on the above-mentioned fact of Hitler’s solitary walks and chose a section between his residence and the tea house, where for a long time there was no guard nearby, and the leader himself was in an open area visible from even 200 meters away.

It was precisely this moment, when Hitler walked to the tea house, that the British command decided to use during the planning of the assassination attempt on his life. The SOE intended to send a sniper who would position himself no more than 200 meters from Hitler’s walking route and take a deadly shot from there. This plan was difficult in itself, but the British additionally aimed to prevent the news of the German leader’s death from reaching the public as having been caused by the Allies. In other words, they did not want to make a martyr out of Adolf Hitler, and they intended to blame an Austrian or German citizen, thus suggesting betrayal by a citizen of the Third Reich. This person was supposed to have expertise in sabotage and sniping, speak German perfectly, and have a carefully prepared German uniform. Their equipment was to include a Mauser sniper rifle equipped with a telescopic sight, wire cutters, as well as hand grenades. The sniper was to be provided with false German documents, and his route under Berghof, hiding place, and of course, later evacuation, were meticulously planned.

Adolf Hitler and Joachim von Ribbentrop in front of the train Amerika
Source: fanwave.it

Seeing the complexity of the above plan and the significant risk of the operation failing, the people at SOE also considered other options for an assassination attempt on Hitler at his alpine villa. Among them were:

  • An ambush on Hitler’s car near Berghof in case the sniper failed to kill him. For this purpose, a group of people equipped with a bazooka or PIAT grenade launcher was planned to be sent there, capable of penetrating the Führer’s armored limousine.
  • Derailed armored train “Amerika” carrying Hitler, or a sniper shot when he disembarked at the railway station. However, approaching the train closely would be very difficult due to the extremely numerous guards during stops. Soldiers from the “Begleit” battalion, SS men from the “Leibstandarte,” and Gestapo patrolled not only the train but also the station and the surrounding area. Additionally, the railway tracks were thoroughly checked before the armored train passed.
  • A British commando raid on Berghof. This plan was rejected due to the high risk of such an operation and the potential difficulty in keeping it secret – many people would have to be involved in its execution.
  • Poisoning Hitler with an odorless substance thrown into his tea, or with anthrax bacteria. Death was to occur after a week, preventing the use of an antidote.

In the end, the British command did not choose any of the above variants for the attempted assassination of Adolf Hitler. Events on the Eastern Front caused him to travel to the front headquarters at the Wolf’s Lair in July 1944 and he never returned to the Berghof villa. From that time on, among high-ranking Allied military officials, the view prevailed that the war was already lost for Germany and there was no point in removing Hitler from the scene, as he was believed to be only worsening the hopeless situation of the Third Reich along with his generals.

There is also a suggestion that the assassination attempt was actually carried out. In German archives, there was a mention of a sniper in a mountain troop uniform being shot by a German patrol near Berghof. It could have been a sniper sent by SOE who failed to take a fatal shot at Adolf Hitler. We may never know the truth because a large portion of the British special operations documents allegedly burned down in a fire at the SOE headquarters in 1946, and those that survived may forever be classified.

On August 10, 1945, at 2:30 a.m., the Japanese Supreme War Council listened with attention to the words of its Emperor. Hirohito, the Son of the Sun, addressed his countrymen in this way:

“We have resolved to endure the unendurable and suffer what is insufferable.”

This, of course, meant the unconditional surrender of Japan as a direct consequence of more than three years of fighting, which ended in the American Boeing B-29 Superfortress dropping the first nuclear bombs in the history. The targets were the Japanese cities of Hiroshima and Nagasaki.

On August 6, a group of four B-29 bombers appeared in the sky above Hiroshima. One of them, called “Enola Gay” by its commander, dropped a 4-ton bomb with the code name “Little Boy” on the Japanese city. The explosion occurred 43 seconds after being dropped, 500 meters above the ground, and the nuclear mushroom, which quickly formed over the city, was several kilometers high. “Little Boy” literally razed the Japanese metropolis to the ground, destroying or severely damaging 70 thousand of the 76 thousand buildings standing there. 30% of the population of Hiroshima, i.e. at least 78,000 people, died. Those residents who were within 400 metres from the epicentre of the explosion simply evaporated, and in some cases there was only a trace left on the concrete. Severe burns were received by people staying even 3.5 km from the place of detonation of “Little Boy”.

Destroyed Hiroshima after August 6, 1945
Source: U.S. Navy via Wikimedia Commons

Despite the enormity of the tragedy, the incredible destruction and the mere fear of “terrible American weapons”, Japan did not surrender on August 6 or the day after. The emperor was convinced that the Americans certainly had only one bomb and that the danger had passed. Japan intended to defend itself to the very end – to the last soldier, to the last bullet, to the last ship. The steadfastness of the imperial defense was demonstrated, among others, by the defense of Iwo Jima and suicide attacks of the “divine wind”, which, shouting the name of the emperor, drove into the ships of the US Navy. The victory of Iwo Jima is one of the most bloody pages in the history of American Marines and the only battle in the Pacific war, where the losses of the attacking Americans (killed and wounded) were higher than those of the defending Japanese.

There were terrible carpet bombing raids on Tokyo, including that of March 9/10, 1945, during which 334 B-29 bombers dropped 1667 tons of incendiary bombs on the Japanese capital, burning 277,000 buildings and killing about 80,000 people – more than during the extermination of Hiroshima.

It was only the second nuclear attack on another Japanese city, Nagasaki, that forced Emperor Hirohito to accept the fact that he had lost the war and to put the country into the hands of the Americans. The Second World War in the Pacific ended with the signing of the unconditional surrender of Japan on September 2, 1945 on the Missouri battleship.

The construction and use of the atomic bomb changed the world – it ended one global conflict, started a massive arms race, changed the distribution of power on the planet and forced the development of new war strategies. How did the design of the first atomic bomb come about and why did the Americans care so much about the time of its construction?

Robert Oppenheimer and general Leslie Groves at the Trinity Test site
Source: U.S. Army Corps of Engineers via Wikimedia Commons

The United States had been conducting research into the uranium element since 1939, but this work was initially of little priority. In February 1941, only $6,000 was allocated for the study of the atomic bomb, compared to 1945 when it was already in use… 2 billion dollars. Since 1942, the work to build the American nuclear explosive was called the “Manhattan Project”. In the city of Los Alamos, located in the state of New Mexico, more than 60 km from the nearest city, a secret center was established where the most prominent atomists of that time were gathered. As Sławomir Gowin wrote in his book “Hiroshima and Nagasaki”: “it’s no exaggeration to say that if one of the brilliant physicists wasn’t there, it meant he was working in Germany or the Soviet Union”. The American team was led by Robert Oppenheimer, a university professor from Berkeley.

After more than three years of work and effort by many people not only in Los Alamos, but also in other laboratories, the Manhattan Project was coming to an end. The first ever test of nuclear weapons, called by Oppenheimer “Trinity”, was to take place on July 16, 1945 in a desert near the city of Alamogordo, New Mexico.

The bomb was placed on a 30-metre high tower in order to simulate the explosion that was to take place after the bomb was dropped from an aeroplane. The training ground watched, hidden in the bunkers, the majority of the crew from Los Alamos. Interestingly, the scientists were not entirely sure about the exact force of the explosion, because they predicted an explosion that would have a force equal to the detonation of one hundred to several thousand tons of TNT. After the test was finished, it was calculated that it was as much as 20 thousand tons.

When the bomb went off, every life was annihilated up to 1600 meters from the epicentre of the blast, the temperature was three times the surface of the Sun, and the trembling of the windows in the buildings was felt up to 320 km from Alamogordo!

Nuclear explosive during the Trinity test.
Source: Jack W. Aeby via Wikimedia Commons

The effect of the detonation of the charge was terrible. Robert Oppenheimer, head of the scientists working on the Manhattan Project, said so a few hours after the explosion:

“Now, I am become Death, the destroyer of worlds.”

The reactions of the other scientists were similar. Terror prevailed, and there was a feeling of creating a weapon that would become a turning point in history and change the rules of war forever.

On the same day, the President of the United States, Harry Truman, received a telegram of the following content: “Operated on this morning. Diagnosis not yet complete but results seem satisfactory and already exceed expectations. Local press release necessary as interest extends great distance. Dr. Groves pleased. He returns tomorrow. I will keep you posted.” that coded message meant the success of the test of the first nuclear bomb in history. Truman already knew that he was the winner of the atomic race: Soviet scientists were far behind the Americans, and the German laboratory in Haigerloch (where the German bomb was being built) was taken over by the Allies. The success of the Manhattan Project was beneficial to the president for two reasons:

Firstly, the drop of the atomic bomb on Japan was intended to help Americans avoid massive loss of life during a further land offensive in the Far East. The closer American ships were to Tokyo, the greater the resistance of Japanese defenders. General Douglas MacArthur counted that defeating Japan will cost the United States even half a million more lost soldiers! Even though they were certain of their ultimate victory, the Americans preferred to use a new bomb against the Emperor rather than face the Japanese infantry, the rest of the fleet and the kamikaze pilots for months to come.

Photograph taken during the Potsdam Conference. In the bottom row in the middle, proud of his scientists president Harry S. Truman.
Source: Presidential Collection of Harry S. Truman, via Wikimedia Commons

Secondly, Truman was able to satisfy his vanity and a day later, on the first day of the Potsdam Conference, he did not fail to show off his success to Joseph Stalin. The American President was happy to have such a strong bargaining position at the very beginning of the conference. The atomic bomb was supposed to bring him political capital – although the USSR’s accession to the war against Japan was supposed to help defeat the common enemy faster, Truman did not want to share his later influence with Stalin in the occupied country. The goal was clear: it would be the United States which would bring Emperor Hirohito and his troops to their knees.

Stalin’s reaction to this shocking news was very calm, which surprised Truman. As it turned out later, the Soviet dictator knew perfectly well about the work on the American atomic bomb and the Trinity test itself, thanks to his numerous spies operating in the USA, including Klaus Fuchs, a scientist from Los Alamos. The activity of Soviet intelligence during the Manhattan Project and their subsequent acquisition of complete bomb construction plans is a topic for a separate extensive and interesting article.

After both bombs were dropped on Japan, Clark Clifford, the President’s advisor, asked President Harry Truman how he slept at the time. The President replied briefly: “Normally, just like every night”. On that day, Truman did not yet know that the nuclear annihilation of two Japanese cities ended World War II, but was starting a second conflict – the Cold War, an arms race that took place not on the battlefields, but in the offices of politicians and intelligence agencies.